How to Stream Marvel Rivals on OBS: Ultimate Guide
Streaming Marvel Rivals on OBS is easier than you might think. You need to follow a few simple steps to get started.
Many gamers and content creators use OBS Studio to stream their gameplay. It is a popular and powerful tool. With Marvel Rivals being such a hit, streaming it can attract many viewers. Whether you’re new to OBS or looking to improve your streaming setup, this guide will help you.
From installing OBS to setting up the best settings, you will learn everything you need. Let’s get you ready to share your Marvel Rivals gameplay with the world.
Introduction To Marvel Rivals Streaming
Streaming Marvel Rivals can be an exciting way to share your gaming experiences with others. Whether you’re a seasoned gamer or just starting out, streaming allows you to connect with a community of fans who share your passion for Marvel heroes and villains.
Using OBS (Open Broadcaster Software) for your streams can enhance your setup, making your broadcasts look professional and engaging. Let’s dive into why streaming Marvel Rivals is a great idea and how OBS can help you achieve your streaming goals.
Why Stream Marvel Rivals
Streaming Marvel Rivals offers a unique opportunity to showcase your skills and strategies in the game. You get to highlight your favorite Marvel characters and their abilities, which can attract fellow fans to your channel.
Another benefit is the ability to build a community around your streams. You can interact with viewers through live chat, answer their questions, and even get tips and tricks from others. This engagement can lead to lasting friendships and a loyal fan base.
Plus, streaming can be a fun way to document your progress in the game. You can look back at your streams to see how you’ve improved or share memorable moments with your audience. How cool is that?
Benefits Of Using Obs
OBS is a powerful and free software that makes streaming a breeze. One of its biggest advantages is the ability to customize your stream layout. You can add overlays, alerts, and transitions to make your broadcast visually appealing.
Another perk of OBS is its flexibility. It supports various plugins and integrations, which means you can add features like chat widgets, donation alerts, and more. This can make your stream more interactive and engaging for viewers.
OBS also offers high-quality streaming without putting too much strain on your computer. It optimizes your resources to ensure smooth gameplay and clear visuals, which is essential for keeping your audience hooked.
Have you ever thought about streaming Marvel Rivals? What excites you the most about sharing your gaming adventures with others?
Setting Up Obs
Setting up OBS (Open Broadcaster Software) is crucial for streaming Marvel Rivals. OBS is a free and open-source software for video recording and live streaming. To get started, you need to download and install OBS on your computer. This guide will walk you through the steps to ensure you can start streaming with ease.
Downloading Obs
First, visit the official OBS website. You will find download links for different operating systems: Windows, macOS, and Linux. Choose the one that matches your computer’s system. Click the download button. The download will start automatically. This might take a few minutes, depending on your internet speed.
Installation Process
Once the download is complete, locate the installer file. Open the installer file to begin the installation process. Follow the on-screen instructions. These steps include choosing the installation location and agreeing to the terms and conditions. The default settings are usually fine for most users.
After installation, open OBS. You may see an auto-configuration wizard. This helps optimize OBS settings based on your system. Follow the wizard’s prompts, or you can configure settings manually later. OBS is now installed and ready for use.
Configuring Obs For Marvel Rivals
Streaming Marvel Rivals using OBS can enhance your gaming experience. But first, you need to configure OBS correctly. This guide will help you set up OBS to stream Marvel Rivals smoothly.
Optimal Settings
Start by opening OBS and navigating to ‘Settings’. Select ‘Output’ and choose ‘Advanced’ mode. Set the video bitrate to 4500 Kbps for a smooth stream. For audio, keep the bitrate at 160 Kbps. Now, go to the ‘Video’ tab. Set the base resolution to 1920×1080. Set the output resolution to 1280×720. For a smooth stream, set the FPS value to 60.
Customizing The Interface
Customizing your OBS interface can make streaming more enjoyable. Begin by adding a new ‘Scene’. Name it ‘Marvel Rivals’. Now, add ‘Sources’ such as ‘Game Capture’, ‘Audio Input Capture’, and ‘Webcam’. Adjust the size and position of each source. You can also add overlays to make your stream unique. Drag and drop elements to arrange them. Save the layout by clicking ‘Studio Mode’. This helps you preview changes before going live.
With these settings, you are now ready to stream Marvel Rivals on OBS. Enjoy your enhanced gaming experience!
Adding Game Capture
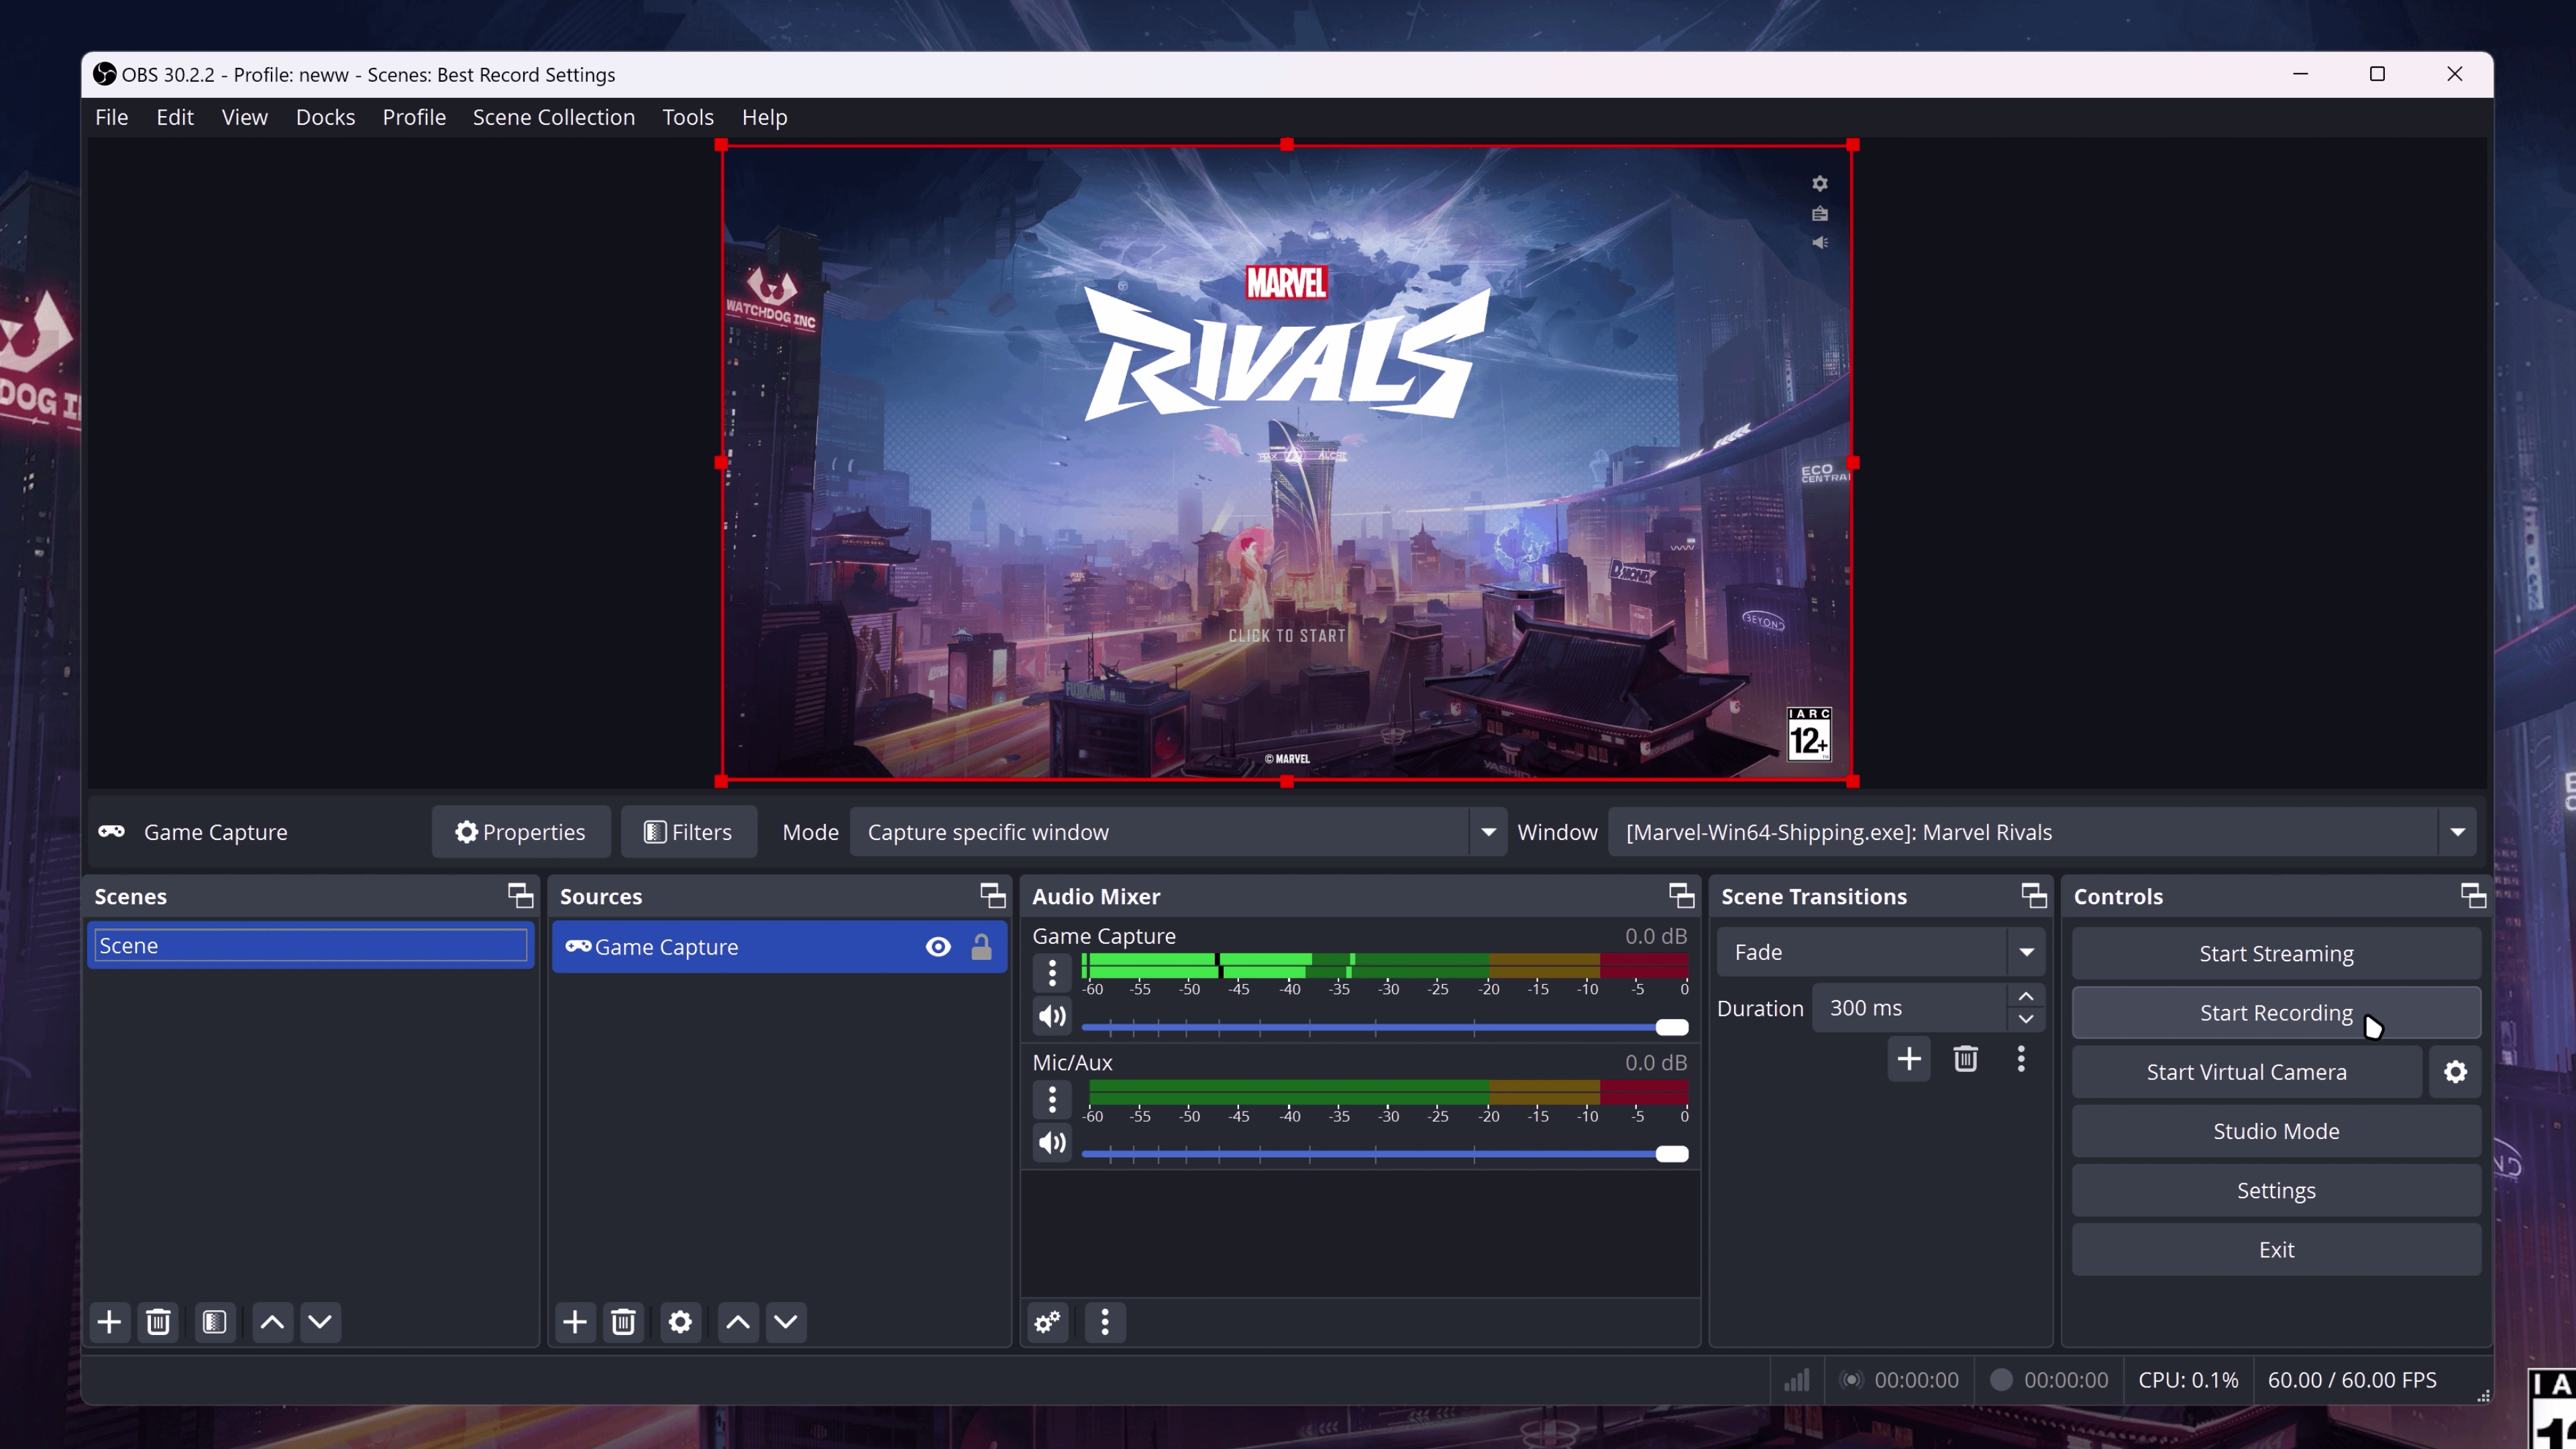
Streaming Marvel Rivals on OBS (Open Broadcaster Software) is straightforward. Adding Game Capture is essential to show your gameplay to viewers. This section will guide you through the process step by step.
Capturing Marvel Rivals
First, open OBS and click the “+” icon in the Sources box. Select “Game Capture” from the list. A new window will appear. Name your new source “Marvel Rivals” and click “OK”. In the next window, select “Capture specific window” from the mode dropdown menu. Choose “Marvel Rivals” from the window dropdown menu. Click “OK” to save your settings.
Adjusting Capture Settings
Now, you can fine-tune your capture settings. Right-click on your “Marvel Rivals” source. Select “Properties”. Here, you can adjust the capture mode or window. Ensure “Capture cursor” is checked if you want to show the mouse. You can also enable “Use anti-cheat compatibility hook” if needed. Click “OK” to save your changes.
Next, resize and position the game capture in the preview window. Click and drag the red border to adjust the size. You can also right-click the source, select “Transform”, and choose “Fit to screen” for a quick setup. This ensures your game looks perfect for your audience.
Integrating Audio Sources
Integrating audio sources in OBS is crucial for a smooth streaming experience. You want your audience to hear your voice clearly. Also, the in-game sounds should be crisp. This guide will help you set up your microphone and in-game audio settings for streaming Marvel Rivals on OBS.
Microphone Setup
First, plug in your microphone. Open OBS and navigate to the “Settings” menu. Click on “Audio” and find the “Mic/Auxiliary Audio” option. Select your microphone from the dropdown list. This ensures OBS captures your voice. Adjust the volume slider to a comfortable level. Make sure your voice is neither too loud nor too soft. Test your microphone by speaking into it. Check the audio levels on the mixer panel. The levels should stay in the green zone. Avoid the red zone to prevent distortion.
In-game Audio Settings
In-game audio is as important as your voice. Open your game and go to the audio settings. Set the master volume to a balanced level. Ensure sound effects and music volumes are neither too loud nor too quiet. Return to OBS and open the “Settings” menu again. Click on “Audio” and find the “Desktop Audio” option. Select your default audio device from the dropdown list. This will capture the game sounds.
Keep an eye on the mixer panel in OBS. Adjust the desktop audio volume to balance with your microphone. You want both audio sources to be clear. Your audience should hear your voice and the game sounds without any issues. Regularly check the audio levels during your stream. This will help you maintain a great audio experience for your viewers.

Credit: www.tiktok.com
Enhancing Your Stream
Enhance your streaming experience with OBS by learning how to stream Marvel Rivals. Use simple settings to improve video quality and engage your audience.
Enhancing Your Stream Setting up your Marvel Rivals stream on OBS is just the beginning. To truly captivate your audience, you need to enhance your stream with engaging elements. This not only makes your stream visually appealing but also keeps your viewers engaged and coming back for more.Adding Overlays
Overlays can transform your stream from ordinary to extraordinary. They provide a professional look and help organize your screen. Consider adding a border around your webcam to highlight your reactions. Also, use game-specific overlays to immerse your viewers in the Marvel Rivals experience. Choose colors and designs that match the theme of Marvel Rivals. This creates a cohesive look.Using Alerts And Widgets
Alerts and widgets are essential for interacting with your audience. They make your stream interactive and engaging. Set up alerts for new followers, subscribers, and donations. This not only acknowledges your viewers but also encourages more engagement. Widgets like chat boxes and event lists are also useful. They keep your audience informed and involved. What kind of alerts and widgets have you found most engaging as a viewer? Consider adding those to your stream. Remember to test everything before you go live. This ensures a smooth and professional stream. Incorporate these elements, and watch your stream come to life.Going Live
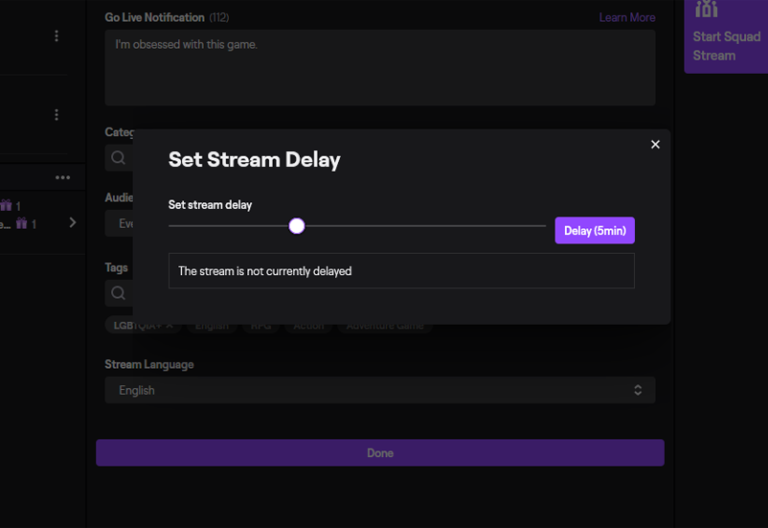
Streaming Marvel Rivals on OBS is exciting. Once you have set up your stream, it’s time to go live. This step is crucial to engage your audience. Here’s how you can make the most of it.
Starting Your Stream
First, open OBS and ensure your settings are correct. Check your video and audio settings. Make sure they are optimal for streaming. Go to the “Controls” section in OBS. Click on “Start Streaming.” This will begin your live broadcast. Watch your stream preview. Ensure everything looks and sounds good.
Interacting With Viewers
Engage with your audience during the stream. Read their comments and respond. Ask questions to keep them involved. Use OBS to display chat on your screen. This helps viewers see the conversation. Keep your tone friendly and welcoming. Make everyone feel included. This will build a loyal community.
Troubleshooting Common Issues
Streaming Marvel Rivals on OBS is exciting. But you might face some issues. Here, we will cover common problems and their solutions. Let’s fix them together.
Fixing Lag
Lag can ruin your streaming experience. First, check your internet speed. Ensure it is stable and fast. Close other apps that use the internet. This will free up bandwidth. Lower your stream’s resolution. This can improve performance. Set OBS priority to high in Task Manager. This helps allocate more resources to OBS.
Resolving Audio Problems
Audio issues can be frustrating. Start by checking your microphone. Ensure it is connected and working. In OBS, go to Settings and select Audio. Ensure the correct devices are chosen. Adjust the volume levels. Make sure they are not too low or muted. Use headphones to avoid echo. This can improve the quality of your stream. Check for updates. Sometimes, updating OBS or your drivers can fix audio issues.
Tips For Growing Your Audience
Stream Marvel Rivals on OBS by ensuring a stable internet connection. Engage your viewers with live commentary and interactive chat. Share your streaming schedule on social media to attract more followers.
Streaming Marvel Rivals on OBS is an exciting way to share your gameplay with the world. But to make your stream a success, you need an engaged audience. Here are some tips to help you grow your audience and keep them coming back for more.Promoting Your Stream
Promote your stream on social media. Share your stream schedule on platforms like Twitter, Instagram, and Facebook. Use relevant hashtags to reach a broader audience. Collaborate with other streamers. Partnering with others can introduce your stream to their followers. Make announcements on gaming forums. Engage with communities who share your interests.Engaging With The Community
Interact with your viewers during the stream. Respond to comments and acknowledge your audience by name. Ask for feedback. Encourage your viewers to share their thoughts on your gameplay and stream. Create polls and ask questions. This makes your viewers feel involved and valued. Join gaming communities. Participate in discussions and share your stream, but avoid spamming. Share personal experiences. Let your audience know more about you and your journey. This builds a connection. Ask yourself, how can you make your stream unique? What can you offer that others don’t? Experiment with different strategies, analyze what works, and adjust accordingly. Growing an audience takes time and effort. Stay consistent, be authentic, and enjoy the process.
Credit: www.youtube.com

Credit: www.youtube.com
Frequently Asked Questions
How Do I Stream Marvel Rivals?
Stream Marvel Rivals on Disney+ by subscribing to the service. Access Disney+ via the app or website. Search for Marvel Rivals. Enjoy watching!
How Do I Stream My Game On Obs?
To stream your game on OBS, open OBS, click “Settings,” select “Stream,” and connect your streaming service. Add a “Game Capture” source, select your game, and click “Start Streaming. “
How To Stream Marvel Rivals Without Lag?
Ensure a stable internet connection, close background applications, and use a wired connection. Lower in-game settings for smoother streaming.
How To Fix Obs Black Screen Game Capture?
To fix OBS black screen game capture, run OBS as administrator. Ensure game and OBS use the same graphics card. Adjust game capture settings.
Conclusion
Streaming Marvel Rivals on OBS is simple with the right steps. Set up OBS and connect your game. Adjust the settings for quality. Test your stream before going live. Remember to interact with your viewers. They enjoy feeling involved. With practice, streaming becomes easier.
Enjoy your Marvel Rivals experience. Happy streaming!