How to Make a Private Twitch Stream: Step-by-Step Guide
Want to stream on Twitch but keep it private? You can do that.
A private Twitch stream lets you broadcast only to a select audience. This guide will show you how. Streaming on Twitch is fun and engaging. But sometimes, you want to share your content with only a few people. Whether you’re testing a new game or sharing a personal moment, knowing how to make your stream private is essential.
This process is simple and doesn’t take much time. You’ll learn the steps to set up a private Twitch stream quickly. Get ready to control who views your stream and enjoy a more secure streaming experience.
Credit: www.fairlyoddstreamers.com
Introduction To Private Twitch Streaming
Have you ever wondered if you could stream to a select group of people on Twitch? Private streaming is an excellent way to share your content with a closed audience. Whether you’re hosting a private event, testing new content, or simply want a more intimate streaming experience, private Twitch streaming might be the solution you’re looking for.
Why Stream Privately?
Streaming privately allows you to control who watches your content. You may want to share your stream with close friends, family, or a niche community without broadcasting to the entire internet.
This can be particularly useful if you’re trying out new ideas and don’t want to expose them to the public just yet. It also helps in maintaining privacy and a safe environment.
Benefits Of Private Streaming
Private streaming comes with several benefits. First, it creates a more personal connection with your viewers. You can interact more intimately and focus on quality engagement.
It also allows you to manage feedback more effectively. With a smaller audience, you can gather constructive criticism without the noise of a large, public chat.
Moreover, private streaming can be a great way to build a dedicated community. You can offer exclusive content to your loyal followers, creating a sense of belonging and appreciation.
Have you considered the potential of private streaming for your Twitch channel? It could be the key to fostering a closer-knit community and enhancing the viewer experience. Try it out and see how it changes your streaming dynamics.
Setting Up A Twitch Account
Setting up a Twitch account is the first step to stream privately. Let’s explore the process of creating your account and customizing your profile for a unique streaming experience.
Creating Your Account
Visit the Twitch website. Click on the “Sign Up” button. Fill in your details like username, password, and email. Choose a strong password. Agree to the terms and conditions. Click “Sign Up” to create your account. Verify your email to complete the process.
Customizing Your Profile
Once your account is set up, it’s time to customize your profile. Go to your profile settings. Add a profile picture that represents you. Write a short bio. Keep it simple and engaging. Select a banner image. Ensure it’s high quality and relevant. Add social media links to connect with your audience. Set up your channel to reflect your style and personality. This helps viewers relate to you better.
Configuring Privacy Settings
Creating a private Twitch stream ensures only invited viewers can watch. This helps maintain control over who sees your content. To do this, you’ll need to adjust your privacy settings.
Adjusting Privacy Options
First, go to your Twitch dashboard. Look for the settings menu. Click on the “Channel and Videos” tab. Here, you can manage your privacy options.
Find the section labeled “Stream Privacy.” This is where you can control who views your stream. Set your stream to “Private.” This ensures only invited viewers can watch.
Enabling Stream Restrictions
Next, you’ll want to enable stream restrictions. This adds an extra layer of security. Look for the “Stream Restrictions” option in your settings. Enable this feature by clicking the toggle button.
Once enabled, you can set specific restrictions. For example, you can require a password for entry. Share this password only with your chosen viewers. Another option is to restrict viewing to specific Twitch accounts.
Use the “Add Allowed Users” feature. Enter the usernames of people you want to invite. These users will have exclusive access to your stream.

Credit: www.wikihow.com
Setting Up Stream Key
Setting up your stream key is a crucial step in ensuring your Twitch stream remains private and secure. This unique code connects your streaming software to your Twitch account, ensuring that your content is broadcasted to your channel. Let’s dive into the process of locating and securing your stream key to keep your stream safe and private.
Locating Your Stream Key
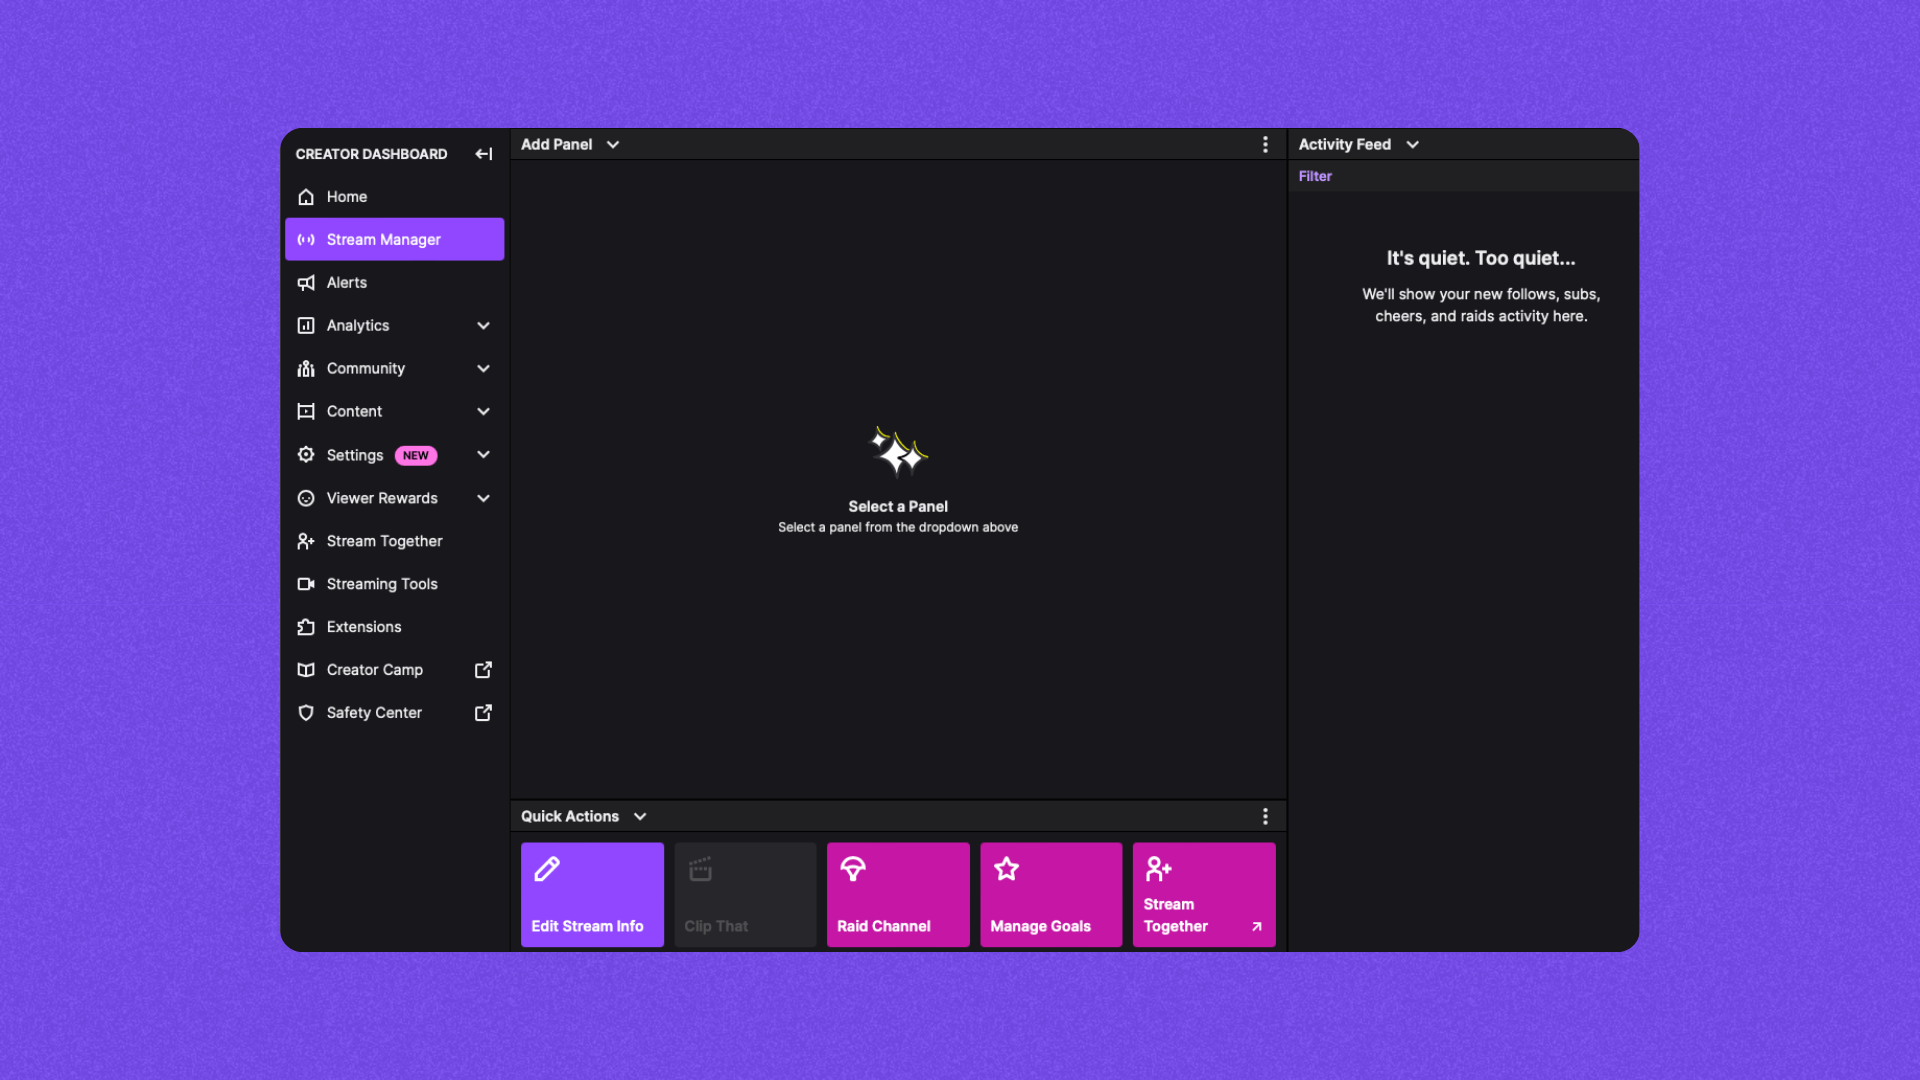
First, you’ll need to locate your Twitch stream key. Log into your Twitch account and navigate to your dashboard. You can find your dashboard by clicking on your profile picture in the top-right corner and selecting “Creator Dashboard” from the drop-down menu.
Once you’re in the dashboard, look for the “Settings” option on the left-hand sidebar. Click on it, and then select “Stream” from the submenu. Here, you will find your stream key displayed prominently under the “Primary Stream Key” section. It’s a long string of letters and numbers. Copy this key as you will need it for your streaming software.
Securing Your Stream Key
Keeping your stream key secure is essential. If someone else gets hold of your stream key, they could broadcast on your channel without your permission. Always treat your stream key like a password – keep it confidential.
To enhance security, consider changing your stream key periodically. You can do this by clicking the “Reset” button next to the stream key in your Twitch settings. This will generate a new key, and you will need to update it in your streaming software.
Also, be cautious of where you store your stream key. Avoid saving it in easily accessible places or sharing it through unsecure methods. Use secure password managers to keep your key safe.
Have you ever had a security scare with your Twitch stream? By regularly updating and securely storing your stream key, you can prevent unauthorized access and protect your stream.
Remember, keeping your stream key secure is a simple yet powerful step in maintaining the privacy and integrity of your Twitch stream.
Choosing Streaming Software
Selecting streaming software is key for making a private Twitch stream. Choose user-friendly options to ensure smooth and secure broadcasting.
Choosing the right streaming software is crucial when you’re planning to make your Twitch stream private. This decision can significantly impact the quality of your stream and your overall streaming experience. You’ll want to choose software that is user-friendly, reliable, and packed with the features you need.Popular Streaming Software
There are several streaming software options available, but some stand out due to their popularity and functionality. OBS Studio is a favorite among many streamers for its open-source nature and extensive customization options. It’s free to use and supports multiple platforms. Streamlabs OBS is another excellent choice. It’s built on the OBS Studio framework but offers a more user-friendly interface with integrated features like alerts and overlays. XSplit is a paid option that provides professional-grade features and a straightforward user interface. It’s ideal for those who want a polished streaming experience without delving too deep into technical details.Installing And Configuring Software
Installing your chosen streaming software is usually a straightforward process. Download the software from the official website. For instance, if you choose OBS Studio, head to obsproject.com and download the version compatible with your operating system. Once downloaded, run the installer and follow the on-screen instructions. It’s generally a matter of clicking “Next” a few times. Configuration is where things get interesting. Open your software, and you’ll be prompted to set up your initial settings. For OBS Studio, navigate to the settings menu. Here, you’ll set your resolution, frame rate, and bitrate. These settings can significantly affect the quality of your stream and your computer’s performance. Connect your Twitch account by selecting the “Stream” category in settings and choosing Twitch as your service. You’ll need your Stream Key, which you can find in your Twitch dashboard under “Settings” > “Stream.” Remember to set your stream to private. On Twitch, you can achieve this by enabling the “Subscribers-Only” mode or creating a private group and sharing the link only with selected viewers. By carefully choosing, installing, and configuring your streaming software, you set the stage for a smooth and enjoyable private streaming experience on Twitch. What features are most important to you in streaming software? Have you tried different options to see which fits your needs best? Share your experiences and let’s improve our streams together!
Credit: www.wikihow.com
Customizing Stream Settings
Customizing stream settings is essential when you want to make your Twitch stream private. Fine-tuning video quality and audio preferences can make a significant difference in the viewing experience. Let’s dive into how you can adjust these settings to suit your needs.
Adjusting Video Quality
Video quality is a crucial aspect of your stream. You want your viewers to have a seamless experience without buffering or lag.
Start by navigating to your Twitch settings. Look for the video settings option. Here, you can adjust the resolution and frame rate. Higher resolution means better quality, but it requires more bandwidth.
If you have a stable internet connection, go for 1080p at 60fps. However, if your connection is shaky, consider lowering it to 720p at 30fps. This balance ensures smooth streaming without compromising too much on quality.
Setting Up Audio Preferences
Audio quality is just as important as video. Clear sound can make your stream more enjoyable for your viewers.
In your Twitch settings, locate the audio tab. Here, you can adjust your microphone and desktop audio levels. Ensure your microphone volume is clear but not too loud to avoid distortion.
Use a good quality microphone for the best results. If you’re using background music, keep it at a lower volume so it doesn’t overpower your voice. Regularly test your audio settings before going live to ensure everything sounds perfect.
Have you ever struggled with stream settings? Share your experiences and tips in the comments below!
Inviting Viewers To Private Stream
Creating a private Twitch stream is a great way to share special moments with a select group of people. Once you have set up your private stream, the next step is to invite viewers. Inviting viewers is simple, but requires some steps to ensure only the right people join.
Generating Invite Links
First, you need to generate invite links. These links are unique URLs that grant access to your private stream. Go to your Twitch dashboard and navigate to your stream settings. Look for the option to create a private stream. Once you enable this option, you will see a button to generate invite links.
Click the button, and Twitch will create a unique URL for you. Copy this link and share it with your chosen viewers. Use email or a private message to ensure only the intended recipients get the link.
Managing Viewer Access
Managing viewer access is crucial to maintaining the privacy of your stream. Once you have shared the invite links, keep track of who has received them. If someone who should not have access joins, you can remove them.
To do this, go to your viewer list during the stream. Find the user you want to remove and click on their name. You will see an option to block or remove them from the stream. This ensures your stream stays private.
Set a reminder to monitor the viewer list regularly. This proactive approach will help you maintain control over who watches your stream.
Testing Your Private Stream
Creating a private Twitch stream involves setting up your account privacy settings and inviting select viewers. Customize your streaming settings to control who can watch your live content. Ensure your stream is secure for a smooth, private viewing experience.
Testing your private stream on Twitch is crucial to ensure everything runs smoothly before going live. This step helps you catch any potential issues and fine-tune your setup. It’s an opportunity to make sure your audio, video, and chat settings are perfect. Let’s dive into how you can run a test stream and troubleshoot common issues.Running A Test Stream
First, set your stream to private mode. This ensures only you can see it. To do this, go to your Twitch dashboard, select “Stream Manager,” and adjust your stream settings to private. Next, start your stream just like you would if you were live. This includes turning on your camera, microphone, and any other equipment. Watch your stream from a different device. This helps you see what your viewers will experience. Check the video quality, audio levels, and chat functionality.Troubleshooting Common Issues
Sometimes, things don’t go as planned. If your stream is lagging, check your internet connection. A stable and fast connection is crucial. If your audio is off, make sure your microphone is properly connected and not muted. Adjust the levels in your streaming software. Video not showing up? Ensure your camera is correctly set up and selected in your stream settings. Also, check the lighting in your room. Engage with your viewers by asking for feedback. This can help you identify issues you might have missed. Remember, a successful stream is not just about you; it’s about the experience you provide for your audience. Have you ever had a moment where everything seemed perfect, but your stream still had issues? What steps did you take to resolve them? Share your thoughts and tips below!Going Live Privately
Going live on Twitch can be exhilarating. But sometimes, you want a more private setting. Maybe you want to test your equipment. Or you want to share a special moment with a few friends. Private streams offer the perfect solution.
Starting Your Private Stream
First, log in to your Twitch account. Then, go to your dashboard. Click on the “Settings” tab. Here, you will find “Stream Settings”. Look for the “Privacy” option. Select “Private”. This ensures only invited viewers can join.
Next, generate an invite link. Share this link with your selected audience. Only those with the link can watch your stream. This way, you control who sees your content.
Engaging With Your Audience
Keep your private stream interactive. Ask your viewers questions. Respond to their comments. Make them feel involved. This creates a sense of community.
Use the chat feature actively. Thank your viewers for joining. Share your thoughts and ask for theirs. This keeps the conversation flowing. Your audience will appreciate the personal touch.
Also, consider using overlays. These can make your stream more interesting. Highlight viewer messages. Show recent followers. This adds a dynamic element to your stream.
Conclusion And Best Practices
Creating a private Twitch stream involves adjusting privacy settings and sharing your stream link selectively. Always ensure your audience knows how to join. Follow best practices to maintain control and security.
Creating a private Twitch stream can be a great way to share content with a select audience. It’s easy to control who joins and watches. This ensures a more personal and secure streaming environment. Let’s recap the steps and highlight some best practices.Recap Of Steps
First, set your Twitch stream to private. This involves changing the privacy settings. Next, share the stream link only with those you trust. Use whisper messages or private chats for this. Finally, monitor your stream closely to ensure only invited viewers are joining.Tips For Successful Private Streaming
Keep your audience engaged. Interact with them regularly. Answer their questions and read their comments. This makes your stream more enjoyable. Use good lighting and sound equipment. This improves the viewing experience. Test your setup before going live. This avoids technical issues during the stream. Plan your content. Know what you will talk about or do. This keeps your stream focused and interesting. Lastly, enforce your privacy. Remind viewers not to share the stream link. Following these tips can help ensure your private Twitch stream runs smoothly and stays enjoyable for all participants. “`Frequently Asked Questions
Can You Do A Private Stream On Twitch?
No, Twitch does not support private streams. All streams are public by default. Use other platforms for private streaming.
How Do I Make A Private Stream?
To make a private stream, access your streaming platform’s settings. Select “Private” or “Unlisted” under privacy options. Save changes.
Can You Make Twitch Accounts Private?
No, you cannot make Twitch accounts completely private. You can adjust privacy settings to limit information sharing.
Can You Do A Private Stream On Twitch Reddit?
No, Twitch does not support private streams. All Twitch streams are public and viewable by anyone.
Conclusion
Creating a private Twitch stream is simple with these steps. Protect your content and share it with select viewers. Privacy settings offer control and peace of mind. Follow our guide and stream confidently. Enjoy connecting with your chosen audience. Happy streaming!