How to Stream Audio from Windows to Mac: Easy Guide
You can stream audio from a Windows PC to a Mac easily. First, connect both devices to the same network.
Then, use software or built-in tools to complete the setup. Streaming audio between Windows and Mac can be very useful. Maybe you want to play music from your PC while working on your Mac. Or perhaps you need to share audio files for a project.
Knowing how to stream audio can enhance your productivity and enjoyment. In this guide, we will explain the steps in a simple way. You’ll learn how to connect your devices, choose the right tools, and troubleshoot common issues. Get ready to enjoy seamless audio streaming between your Windows and Mac devices.
Credit: blog.airsquirrels.com
Preparing Your Devices
Streaming audio from Windows to Mac can be smooth and simple. First, you need to prepare your devices. This step ensures everything works properly. Let’s go through the essentials.
Check System Requirements
Ensure both your Windows and Mac systems meet the requirements. Your Windows PC should run Windows 7 or later. Your Mac should have macOS 10.10 or higher. Confirm both devices are connected to the same network. This step is crucial for seamless audio streaming.
Install Necessary Software
Download and install the required software on both devices. Look for apps like SoundWire or Airfoil. These applications facilitate audio streaming between Windows and Mac. Follow the installation instructions carefully. Make sure both devices have the same version of the software.
Setting Up Windows
Set up streaming audio from Windows to Mac easily using tools like Airfoil or SoundWire. Connect both devices to the same network for seamless audio transfer. Enjoy your favorite music or podcasts across platforms effortlessly.
When it comes to streaming audio from your Windows PC to a Mac, setting up your Windows machine properly is crucial. The process involves configuring your audio settings and installing the right streaming software. These steps ensure a smooth and seamless audio streaming experience.Configure Audio Settings
First, you need to ensure your audio settings are correctly configured on your Windows PC. Open the “Control Panel” and navigate to “Hardware and Sound”. Click on “Sound” and a new window will pop up. Select your default playback device, usually labeled “Speakers” or “Headphones”, and click “Properties”. Go to the “Advanced” tab. Here, you can set the default format for your audio. For streaming purposes, setting it to a standard like 16-bit, 44100 Hz (CD Quality) ensures compatibility. Test your audio settings by playing a sample audio file. Ensure you hear the sound clearly through your default playback device.Install Streaming Software
Next, you need to install software that can stream audio from your Windows PC to your Mac. A popular choice is “VB-Audio VoiceMeeter”. Download VoiceMeeter from the official website and run the installer. Follow the on-screen instructions to complete the installation. After installation, open VoiceMeeter. You will see several options for routing your audio. Set your default playback device to VoiceMeeter Input (VB-Audio VoiceMeeter VAIO). This allows VoiceMeeter to capture all system audio. Now, you need software on your Mac to receive the stream. A good option is “Soundflower”. Once both applications are set up, you should be able to stream your Windows audio to your Mac. Have you ever faced any issues with audio streaming? Share your experiences and solutions in the comments! By following these steps, your Windows PC will be ready to stream audio to your Mac, allowing you to enjoy seamless audio playback across devices.Configuring Mac
Configuring your Mac is a crucial step to stream audio from Windows. By adjusting the right settings, you can ensure a smooth and seamless audio streaming experience. This section will guide you through the necessary steps to set up your Mac for audio streaming.
Adjust Audio Preferences
First, open the System Preferences on your Mac. Click on the “Sound” icon. This will display the sound settings. Here, you need to select the “Output” tab. Choose the device where you want the audio to play. Ensure the volume is set to an appropriate level. This ensures you can hear the audio clearly.
Next, go to the “Input” tab. Select the right input device, such as a microphone. This is important if you plan to use voice input. Adjust the input volume slider to an appropriate level. This helps in capturing your voice clearly without distortion.
Set Up Streaming Software
Now, it’s time to set up the streaming software. You can use software like Soundflower or Loopback. These tools help in routing audio between applications. Download and install the chosen software on your Mac.
After installing, open the software and configure it according to your needs. For example, in Soundflower, select the output device you configured earlier. This directs the audio from Windows to your chosen output device on the Mac. Ensure the settings are saved properly.
Test the setup by playing audio from your Windows PC. You should hear the audio on your Mac. If not, double-check the audio preferences and streaming software settings. Adjust as necessary to achieve the best results.
Connecting Devices
Streaming audio from a Windows PC to a Mac can enhance your listening experience. For a smooth process, connecting your devices is crucial. This section will guide you through the steps to connect your devices effectively.
Use Wi-fi Connection
Ensure both your Windows PC and Mac are on the same Wi-Fi network. This is the first step. Open the sound settings on your Windows PC. Choose the Mac as the output device. On your Mac, accept the connection request. This allows your Mac to receive the audio stream.
Use Ethernet Connection
Connect your Windows PC and Mac using an Ethernet cable. This provides a stable connection. Open the network settings on both devices. Ensure they are on the same local network. Select the Mac as the output device in Windows sound settings. Your Mac will receive the audio stream through the wired connection.
Testing The Connection
Stream audio from Windows to Mac by testing the connection using tools like Soundflower or Airfoil. This ensures smooth audio sharing between devices.
Testing the Connection Once you have everything set up to stream audio from your Windows to your Mac, it’s crucial to ensure the connection works perfectly. Testing the connection might seem like a minor step, but it can save you a lot of time and frustration. This is where you can fine-tune the settings and troubleshoot any issues that might arise. Let’s dive into how you can test the connection effectively.Play A Sample Audio
The simplest way to test the connection is by playing a sample audio file. Open a music player or any application on your Windows that can play audio. Choose a song or an audio clip and hit play. Listen carefully on your Mac to check if the audio is clear and there is no lag. Adjust the volume on both devices to find the perfect balance. If you can hear the audio seamlessly on your Mac, congratulations! You’re almost there.Troubleshoot Common Issues
Sometimes, things don’t go as planned. Don’t panic. Check the network connection. Both devices should be on the same network. Ensure that the streaming software is updated to the latest version. Verify the settings in the audio streaming application. Sometimes, a minor tweak can fix the issue. If there is a lag, try restarting both your Windows and Mac. This simple step can resolve many technical glitches. Still having trouble? Consult the help section of your streaming software. Many of them offer step-by-step troubleshooting guides. Have you ever experienced a stubborn issue? How did you resolve it? Share your tips in the comments.Optimizing Audio Quality
Streaming audio from Windows to Mac can be a fantastic way to enjoy your music or podcasts across devices. However, the audio quality might not always be perfect. Optimizing audio quality is crucial for an enjoyable listening experience. Here are some practical tips to help you get the best sound possible.
Adjust Bitrate Settings
Bitrate is essential for audio quality. Higher bitrates mean better sound but require more bandwidth. Experiment with different settings to find the best balance.
In your streaming software, look for the bitrate settings. If you’re using apps like Airfoil or TuneBlade, you can usually find these options in the settings menu. Start with a higher bitrate like 320 kbps, and if you experience lag, try lowering it to 256 kbps or 192 kbps.
Don’t be afraid to test different settings. You might be surprised at how much the audio quality can improve with just a small adjustment.
Use External Audio Devices
External audio devices can make a big difference in sound quality. A USB DAC (Digital to Analog Converter) can provide cleaner sound.
I once used my old pair of headphones directly plugged into my Mac’s headphone jack. The sound was decent, but when I switched to using a USB DAC, the improvement was noticeable. The music was clearer, and the bass was richer.
Consider investing in a good pair of speakers or headphones designed for high-quality audio. These devices often come with their own drivers and software to optimize sound further.
Have you tried using external audio devices before? If not, it might be worth a shot to enhance your streaming experience.
Optimizing audio quality doesn’t have to be complicated. With a few tweaks and the right equipment, you can significantly improve your listening experience when streaming audio from Windows to Mac.
Advanced Streaming Options
Streaming audio from Windows to Mac can be simple with the right tools. Advanced streaming options provide more control and flexibility. These methods enhance your streaming experience. Let’s dive into two effective ways to stream audio seamlessly.
Use Bluetooth
Bluetooth is a wireless option for streaming audio. First, ensure Bluetooth is enabled on both devices. On your Windows PC, go to Settings > Devices > Bluetooth & other devices. Turn on Bluetooth. Then, on your Mac, go to System Preferences > Bluetooth. Make sure Bluetooth is on.
Next, pair the two devices. On your Windows PC, select your Mac from the list of available devices. Follow the on-screen instructions to complete pairing. Once paired, your Mac will appear as an audio output option. Select it to start streaming audio wirelessly.
Explore Third-party Apps
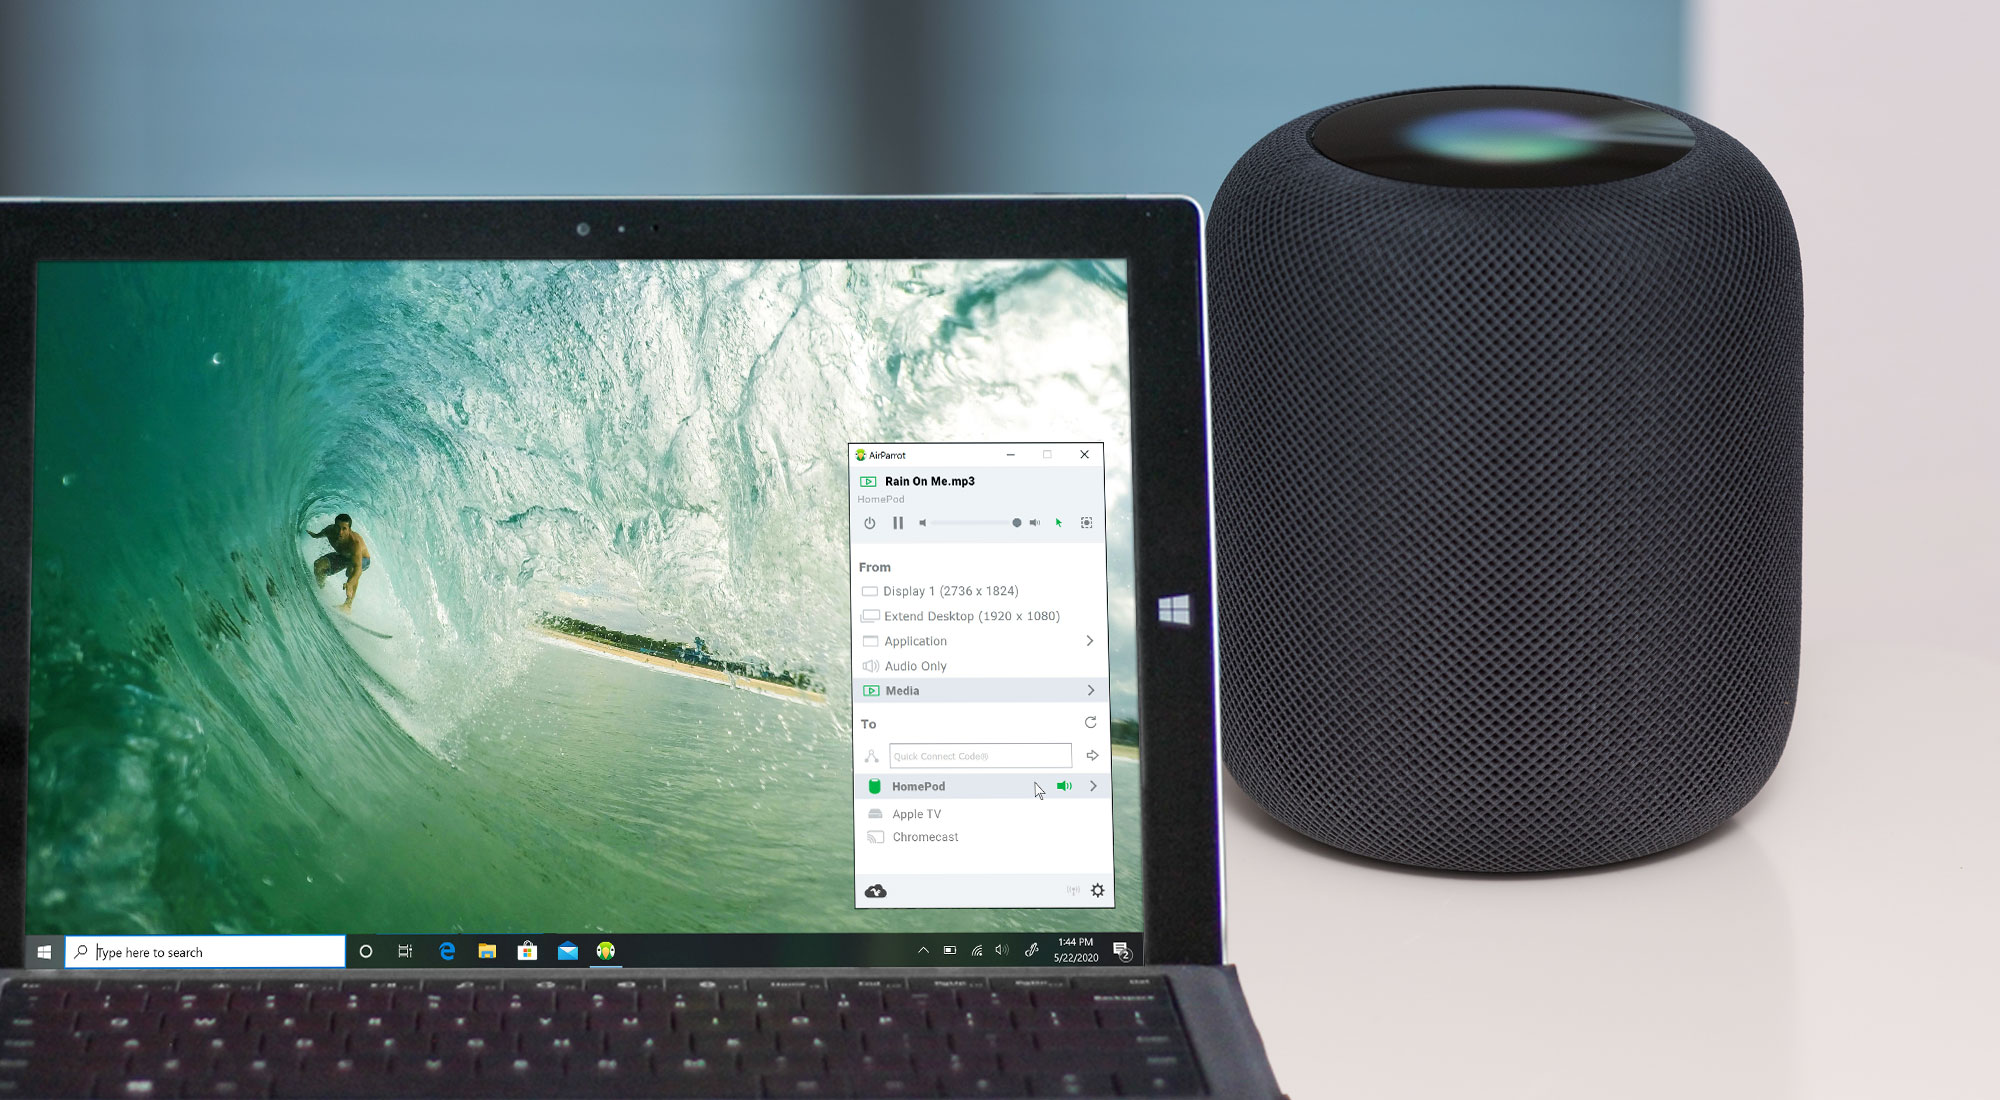
Third-party apps offer more features and flexibility. Many apps are available for streaming audio from Windows to Mac. One popular choice is Airfoil. This app lets you stream any audio from your PC to various devices, including Mac.
To use Airfoil, download and install the app on both devices. Open Airfoil on your Windows PC and select the audio source. Then, open Airfoil on your Mac and choose your PC as the audio source. This way, you can stream high-quality audio without delays.
Other apps, like SoundWire or AudioRelay, also provide similar functionalities. Explore these options to find the one that fits your needs best.
Credit: help.airtame.com
Maintaining The Setup
After setting up audio streaming from Windows to Mac, you need to maintain it. Regular upkeep ensures smooth performance and avoids disruptions. These simple steps will help you keep everything running efficiently.
Regular Software Updates
Keep both your Windows and Mac systems updated. Software updates often include bug fixes and performance improvements. Regularly check for updates in both operating systems. This helps in maintaining compatibility and stability.
Update your streaming software too. Whether it’s a third-party app or built-in feature, staying updated is crucial. Most apps notify you of new versions. Set reminders if needed. This practice ensures you benefit from the latest features and fixes.
Check Connection Stability
Stable connections are key for smooth audio streaming. Regularly check your Wi-Fi network. Strong signal strength prevents audio lags and dropouts. Consider using Ethernet for a more stable connection. Wired connections often provide better performance.
Inspect your cables and adapters. Faulty hardware can disrupt streaming. Replace any damaged components immediately. Regular checks help maintain a seamless audio experience.

Credit: www.amazon.com
Frequently Asked Questions
Can I Cast From Windows To Mac?
Yes, you can cast from Windows to Mac. Use third-party apps like AirParrot or Reflector to enable casting.
How Do I Stream Audio On My Mac?
Open your chosen audio streaming app. Sign in and select the audio content. Click play to start streaming.
Can You Screen Share Audio On A Mac?
Yes, you can screen share audio on a Mac. Use QuickTime Player or third-party apps like Zoom for this feature.
Can You Airplay From Mac To Windows?
No, you cannot AirPlay directly from a Mac to a Windows PC. Use third-party apps like Reflector or AirServer.
Conclusion
Streaming audio from Windows to Mac is simple. Follow the steps outlined. Enjoy seamless audio transfer between devices. Both beginners and experts can do it easily. Remember, practice makes perfect. Happy streaming!