How to Change the Streaming Quality on Twitch: Ultimate Guide
Changing the streaming quality on Twitch is simple. You can adjust it to match your internet speed.
Here’s how. Twitch is popular for live streaming games and events. Sometimes, the video quality may not fit your internet speed. This can lead to buffering or poor video. Knowing how to change the streaming quality can help. It ensures a smoother viewing experience.
Whether you’re a viewer or a streamer, adjusting the quality can make a big difference. This guide will show you step-by-step how to change the streaming quality on Twitch. Let’s get started!
Basic Requirements
Changing the streaming quality on Twitch involves a few basic requirements. Your internet speed and device specifications play a crucial role. Ensuring both are up to par can help you achieve a seamless streaming experience.
Internet Speed
Internet speed is vital for streaming quality. Twitch recommends a stable upload speed of at least 3 Mbps for standard streaming. For higher resolutions like 1080p, aim for 6 Mbps or higher. Use online speed tests to check your current upload speed.
If your speed is lower than recommended, consider upgrading your internet plan. A wired connection usually provides more stability than Wi-Fi. Avoid heavy internet usage during streaming to maintain optimal speed.
Device Specifications
Your device specifications also impact streaming quality. Twitch suggests using a computer with at least an Intel Core i5 processor. 8 GB of RAM is recommended for smoother performance.
Graphics cards are important too. A dedicated GPU can enhance video quality. Ensure your device is up-to-date with the latest drivers. Regularly clean up unnecessary files and programs to keep your device running efficiently.
Credit: help.twitch.tv
Accessing Settings
Change the streaming quality on Twitch by accessing the settings. Select the gear icon on the video player, then choose your preferred quality. Enjoy a smooth viewing experience.
Accessing the settings on Twitch is a crucial step if you want to change your streaming quality. Whether you’re experiencing lag or you want to enhance the viewing experience, knowing how to access and adjust these settings can make a big difference. Let’s dive into the steps to find and navigate the settings on Twitch to change your streaming quality.Finding The Settings Menu
To begin, make sure you’re logged into your Twitch account. Once you’re in, look for your profile icon at the top-right corner of the screen. Click on it to open a dropdown menu. In the dropdown menu, you’ll see various options. Locate and click on “Settings.” This will take you to the main settings page where you can find all the configuration options for your Twitch account.Navigating To Quality Options
Once you’re in the settings menu, you need to find the quality options. This is usually under the “Stream” tab. Click on “Stream” to access all the streaming-specific settings. Within the “Stream” tab, look for the “Quality” section. Here, you’ll see different quality settings such as 1080p, 720p, or 480p. Select the quality that suits your needs best. If you have a slower internet connection, opting for a lower quality can help reduce buffering. Now, save your changes. You’ve successfully adjusted your streaming quality! Is your stream still buffering despite the change? It might be worth checking your internet speed or trying a different streaming software. By following these steps, you can ensure a smoother and more enjoyable experience for your viewers. Happy streaming!Adjusting Quality
Streaming on Twitch is an exhilarating experience. However, ensuring your viewers have the best experience is crucial. Adjusting the quality of your stream can make a significant difference. Let’s dive into how you can tweak these settings for optimal results.
Changing Resolution
Resolution is the cornerstone of your stream’s visual quality. Changing it adjusts how sharp and clear your stream appears to viewers.
To change your resolution, start by opening your streaming software. Look for the settings or options menu. Here, you’ll find the video settings where you can adjust the resolution.
Consider your internet speed and your viewers’ likely connection speeds. If you have fast internet, you can stream at 1080p. However, for slower connections, 720p might be a better option.
Remember, a higher resolution demands more from your computer and internet connection. Test different resolutions to find what works best for you and your audience.
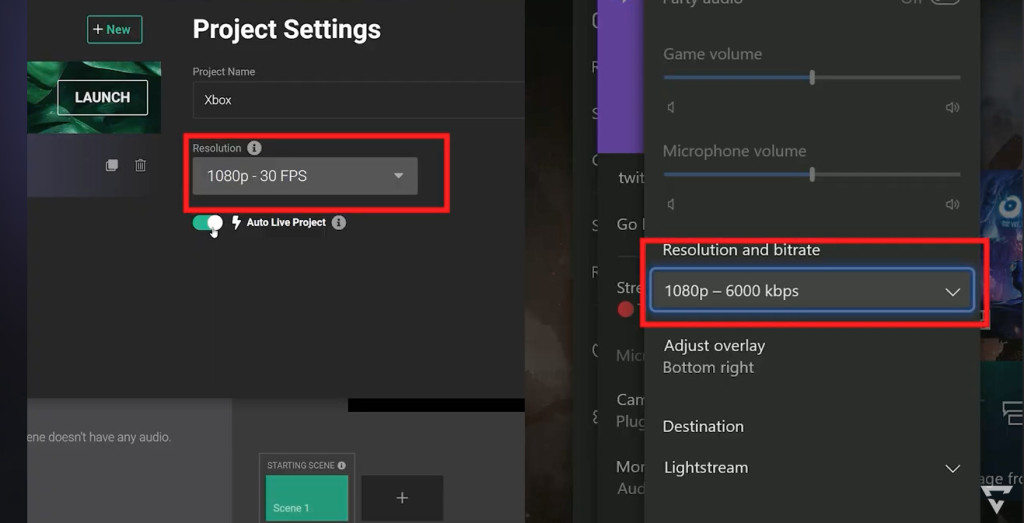
Setting Bitrate
Bitrate is equally important as resolution. It determines the amount of data sent to Twitch, affecting the stream’s quality and stability.
Adjusting the bitrate can be done in the same settings menu as the resolution. You’ll typically find a slider or a box where you can input a number, measured in Kbps (kilobits per second).
For a 1080p stream, a bitrate between 4500 to 6000 Kbps is recommended. For 720p, a range of 3000 to 4500 Kbps usually works well.
Again, balance is key. Higher bitrate means better quality but requires more bandwidth. Ensure your internet can handle the bitrate you choose without causing lag or buffering.
Adjusting the bitrate and resolution may seem technical, but it’s straightforward once you get the hang of it. Experiment with these settings to find the perfect balance for your stream.
Have you ever adjusted your stream quality settings? What challenges did you face? Share your tips and experiences in the comments below!
Advanced Options
Changing the streaming quality on Twitch can enhance your viewers’ experience. Advanced options provide more control over your stream. These settings can help you optimize your stream for better performance. Let’s explore some of these advanced options.
Custom Encoding Settings
Custom encoding settings allow you to fine-tune your stream quality. You can adjust the bitrate to match your internet speed. A higher bitrate can improve video quality. But, it requires more bandwidth. Ensure your internet connection can handle it.
Adjust the resolution and frame rate for better performance. A lower resolution can make your stream smoother. But, it may reduce the visual quality. Find a balance that works for you.
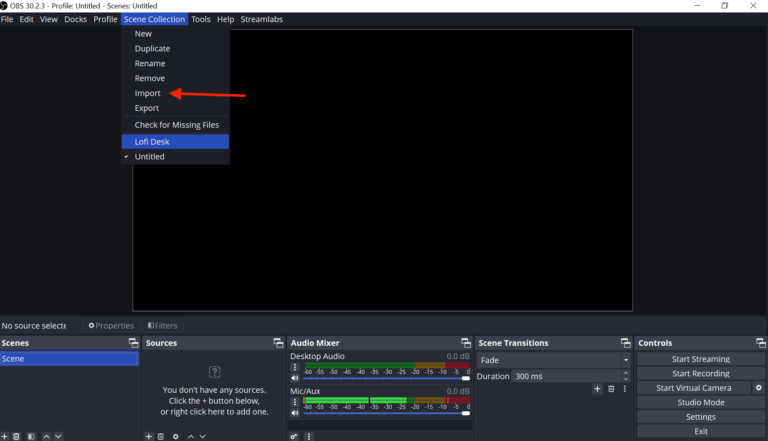
Using Third-party Software
Third-party software can offer more advanced features. OBS Studio and Streamlabs are popular choices. They provide tools to enhance your stream quality. These tools help you adjust settings with ease.
OBS Studio allows you to customize your stream layout. It also offers advanced encoding options. Streamlabs integrates with Twitch for a seamless experience. Both options are free and widely used by streamers.
Experiment with different settings. Find what works best for your stream. Advanced options can help you create a better viewing experience.
Mobile Streaming
Streaming on mobile devices has become increasingly popular among Twitch users. Many enjoy the convenience and flexibility of watching their favorite streams on the go. However, managing streaming quality on mobile can be a bit tricky. This guide will help you adjust your settings to improve your mobile streaming experience.
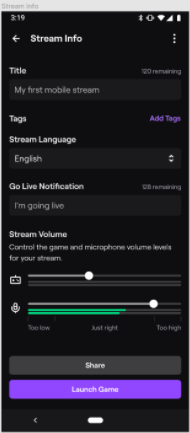
Changing Quality On Mobile
First, open the Twitch app on your mobile device. Select the stream you want to watch. Tap the screen once to reveal the playback options. You will see a gear icon in the top right corner. Tap the gear icon to open the settings menu. Look for the “Quality” option. It might be listed as “Video Quality” or “Stream Quality”. Select your preferred quality from the options. Lower quality settings can help reduce buffering. Higher quality settings provide a better viewing experience.
Optimizing For Data Usage
Streaming on mobile can use a lot of data. To manage your data usage, choose a lower quality setting. This helps reduce the amount of data used. It can also prevent your stream from pausing to buffer. You can also monitor your data usage through your device settings. Some mobile plans offer unlimited data, but many do not. Being mindful of your data usage can save you from extra charges. Always check your mobile plan to understand your data limits.
Credit: golightstream.com
Troubleshooting
Experiencing issues with your Twitch streaming quality can be frustrating. Sometimes, you may face problems that hinder your viewing experience. This section will help you troubleshoot these issues. We will cover common problems and provide solutions for lag and buffering.
Common Issues
Common issues with Twitch streaming include poor video quality, lag, and buffering. These problems can result from various factors. Internet speed plays a significant role. Ensure your connection is stable. Sometimes, software settings can cause issues. Check your browser and update it regularly. Also, clear your cache and cookies.
Fixing Lag And Buffering
Lag and buffering disrupt your viewing experience. To fix these, first, lower the streaming quality. This reduces the data load. Check your internet speed. A higher speed offers a better experience. Use a wired connection instead of Wi-Fi. This ensures stability. Close other applications using the internet. They may slow down your connection. Lastly, updating your device’s drivers can help. Outdated drivers often cause performance issues.
Tips For Best Quality
When it comes to streaming on Twitch, ensuring your viewers have the best quality experience is crucial. Quality streaming can make a significant difference in how your content is received and can help you stand out. Here are some practical tips to help you achieve the best streaming quality.
Optimizing Internet Connection
Your internet connection is the backbone of your stream. A stable and fast connection is necessary to avoid buffering and lag.
First, check your internet speed. Platforms like Speedtest can help you determine if your upload speed meets Twitch’s requirements. Aim for an upload speed of at least 5 Mbps for a smooth stream.
Consider using a wired Ethernet connection instead of Wi-Fi. Wired connections are more reliable and offer lower latency.
Close unnecessary applications and devices using your bandwidth. This will ensure that your streaming gets the maximum internet speed possible.
Upgrading Streaming Equipment
Good equipment can significantly improve your stream quality. If you are serious about streaming, investing in the right gear is essential.
Start with your camera. A high-definition camera will provide a clearer picture and enhance your viewers’ experience. Logitech and Razer offer excellent options for streamers.
Next, consider your microphone. Clear audio is just as important as video quality. A USB microphone like the Blue Yeti or Audio-Technica AT2020 can make a big difference.
Don’t forget about lighting. Proper lighting can make you look more professional. Simple ring lights or softbox lights can be very effective and are not too expensive.
Lastly, a powerful computer can handle high-quality streaming settings. Ensure your PC or laptop meets Twitch’s streaming requirements. Upgrading your RAM or graphics card can also help.
By optimizing your internet connection and upgrading your streaming equipment, you can enhance your Twitch streaming quality. What steps will you take to improve your stream today?
:max_bytes(150000):strip_icc()/how-to-choose-the-best-twitch-bitrate-50758011-85578f730ac04acca6fa630bed7de2d2.jpg)
Credit: www.lifewire.com
Frequently Asked Questions
How To Adjust Streaming Quality?
To adjust streaming quality, open the settings menu in your app. Select “Quality” or “Video Resolution” and choose the desired option. Higher resolutions offer better quality but use more data. Lower resolutions save data and load faster.
How Do I Get 1080p Stream Quality On Twitch?
To get 1080p stream quality on Twitch, ensure your internet upload speed is at least 6 Mbps. Adjust your stream settings to 1080p resolution and a bitrate of 4500-6000 kbps. Use a strong, wired internet connection for stability.
Can You Stream 480p On Twitch?
Yes, you can stream 480p on Twitch. Ensure your internet connection supports the required bitrate for smooth streaming.
Should I Stream 1080p Or 720p On Twitch?
Stream 1080p for better quality if you have a strong internet connection. Opt for 720p if bandwidth is limited.
Conclusion
Changing the streaming quality on Twitch is simple. Follow the steps mentioned above. Adjusting your settings can enhance your viewing experience. Clear streams make a big difference. Happy streaming!