How to Copy Streaming Video Mac: Step-by-Step Guide
Copying streaming video on a Mac can seem tricky. But it’s possible with the right tools.
Streaming videos are everywhere. Sometimes, you might want to save a favorite video to watch offline. Luckily, there are ways to do this on your Mac. This guide will help you learn how to copy streaming videos easily. With simple steps and the right software, you’ll be able to save videos for later.
Whether it’s a tutorial, a movie, or a live event, copying streaming video can be very useful. Let’s dive into how you can do it on your Mac.
Requirements
Copying streaming video on a Mac requires specific software and hardware. This section outlines the essential requirements to ensure smooth video copying.
Necessary Software
To copy streaming video on a Mac, install appropriate software. Popular choices include OBS Studio and VLC Media Player. These tools offer user-friendly interfaces and reliable performance. Ensure the software is updated to the latest version for best results.
System Specifications
Your Mac should meet certain system specifications. A minimum of 8GB RAM is recommended for efficient video processing. Ensure your macOS is updated to the latest version. A stable internet connection is crucial for uninterrupted streaming.
Additionally, sufficient storage space is needed. Video files can be large, so having ample disk space is important. A faster processor will also enhance performance. Consider upgrading your hardware if necessary.
Credit: www.movavi.com
Choosing The Right Software
When it comes to copying streaming videos on your Mac, the first and most critical step is choosing the right software. With numerous options available, finding the one that fits your needs can be overwhelming. This section will guide you through the top software options and compare their features to help you make an informed decision.
Top Software Options
There are several software options that you can use to copy streaming videos on your Mac. Here are a few popular ones:
- OBS Studio: This free, open-source software is widely used for video recording and live streaming. It offers a range of features and is highly customizable.
- Camtasia: Known for its user-friendly interface, Camtasia is a great option for beginners. It also offers powerful editing tools.
- ScreenFlow: This software is specifically designed for Mac users. It offers high-quality video recording and a variety of editing features.
- Movavi Screen Recorder: This tool is easy to use and allows you to capture streaming videos with just a few clicks. It also supports various output formats.
Comparing Features
To help you decide which software is best for you, let’s compare some key features:
| Software | Price | Ease of Use | Editing Tools | Output Formats |
|---|---|---|---|---|
| OBS Studio | Free | Medium | Basic | Multiple |
| Camtasia | $249 | Easy | Advanced | Multiple |
| ScreenFlow | $129 | Easy | Advanced | Multiple |
| Movavi Screen Recorder | $39.95 | Very Easy | Basic | Multiple |
Consider what you value most in software. Do you prefer something free or are you willing to invest in more advanced features? Do you need powerful editing tools, or is simplicity more important?
For instance, if you’re new to video recording and editing, Camtasia or ScreenFlow might be the best choice due to their easy-to-use interfaces and advanced editing tools. If you’re on a budget, OBS Studio is a great free option, though it has a steeper learning curve.
Think about your specific needs and preferences. What features are non-negotiable for you? Asking these questions will help you find the perfect software to copy streaming videos on your Mac.
Setting Up Your Mac
Copying streaming video on a Mac is simpler than you think. First, you need to set up your Mac. This involves installing the right software and configuring the settings. These steps ensure you can easily copy streaming videos. Let’s get started!
Installing The Software
Begin by choosing a reliable software for copying streaming videos. Popular options include OBS Studio and VLC Media Player. Download the software from the official website. Open the downloaded file to start the installation process. Follow the on-screen instructions to complete the installation. Restart your Mac if prompted.
Configuring Settings
After installation, you need to configure the software settings. Open the software and navigate to the settings menu. For OBS Studio, go to “Settings” and then “Output.” Set the video bitrate to a suitable value. For VLC Media Player, go to “Preferences” and then “Input/Codecs.” Adjust the caching value to ensure smooth streaming. Save your changes and close the settings menu.
Next, check your audio settings. Go to “Audio” in OBS Studio and select your preferred audio device. In VLC Media Player, go to “Audio” and choose the appropriate output module. Ensure your Mac’s volume is up and not muted. Now, your Mac is ready to copy streaming videos with ease.

Credit: www.amazon.com
Capturing Streaming Video
Learn to copy streaming video on a Mac effortlessly. Follow simple steps using built-in tools or third-party apps. Save your favorite content with ease.
Capturing streaming video on your Mac can be a game-changer. Whether you want to save a webinar for later, create a personal archive, or simply enjoy videos offline, knowing how to capture streaming video is essential. This guide will walk you through the necessary steps, ensuring you get the best quality footage every time. ###Starting The Capture
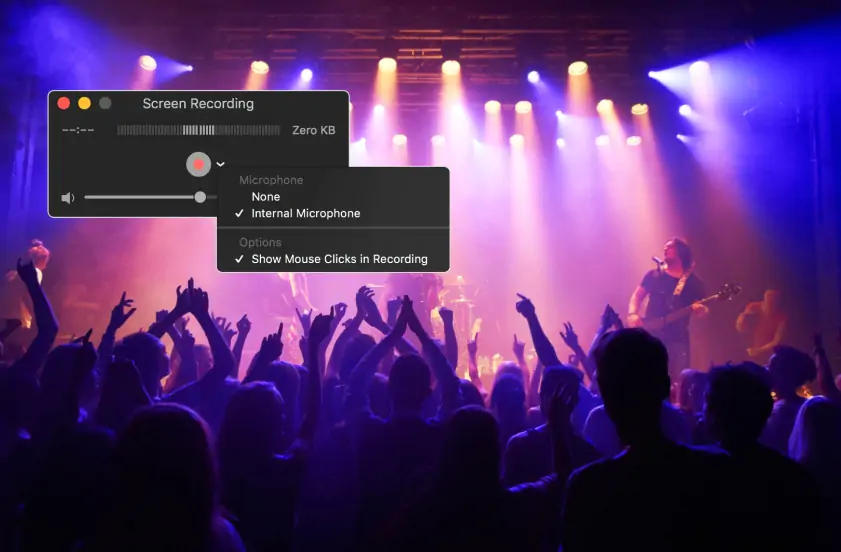
To begin capturing streaming video on your Mac, you’ll need the right tools. QuickTime Player is a built-in option that’s straightforward to use. Open QuickTime Player, then go to “File” and select “New Screen Recording.” Next, click the red record button and choose your recording area. If you want to capture the entire screen, click anywhere. Otherwise, drag to select a specific area. Ensure the streaming video is playing within this area before you start recording. ###Adjusting Quality Settings
Quality settings are crucial for capturing clear and sharp video. In QuickTime Player, you can adjust these settings by clicking the arrow next to the record button. Choose “High” or “Maximum” quality for the best results. Remember, higher quality means larger file sizes, so ensure you have enough storage space. Consider your audio settings as well. You can record with your Mac’s internal microphone or an external one for better sound quality. Make these adjustments before you start recording to avoid interruptions. With these steps, you’ll be well on your way to capturing high-quality streaming videos on your Mac. What are some other tips you’ve found helpful for capturing video? Share your thoughts in the comments!Editing And Saving The Video
Editing and saving the video after copying a streaming video on a Mac can enhance your viewing experience. Whether you want to trim out unnecessary parts or save it in a different format, these steps will guide you through the process. Let’s get started with trimming the video and then move on to choosing the format.
Trimming The Video
Trimming your video ensures you keep only the parts you need. Open the video in iMovie, which is pre-installed on most Macs. If you don’t have it, you can download it from the App Store.
Drag the video file into iMovie. Click on the video timeline and use the yellow handles to select the part you want to keep. Click ‘Crop to Fill’ to finalize your selection.
If you want to cut multiple sections, repeat the process. This way, you can easily remove ads or unnecessary scenes. Click ‘Done’ when you’re satisfied with the trimming.
Choosing The Format
Choosing the right format is crucial for compatibility with different devices. Go to ‘File’ and select ‘Share’ in iMovie. You can then choose ‘File’ to save it to your Mac.
Under ‘Format,’ you can choose options like MP4 or MOV. MP4 is versatile and works on most devices, including smartphones and tablets. MOV is ideal for high-quality playback on Apple devices.
Adjust the resolution and quality settings based on your needs. Higher quality means larger file size. Click ‘Next’ to save your video in the desired format.
These steps will help you trim and save your streaming video effortlessly. Have you tried editing videos before? What format do you prefer? Share your thoughts in the comments!
Troubleshooting Common Issues
Copying streaming video on a Mac can sometimes be tricky. Make sure to use reliable software and follow clear instructions. Adjust settings to ensure smooth video quality.
Copying streaming video on your Mac can sometimes be a tricky process. While the methods available are generally reliable, you might face a few common issues. This section will help you troubleshoot some of the most frequent problems you might encounter.Audio Sync Problems
Audio sync problems can be incredibly frustrating. Imagine watching a video where the sound doesn’t match the action on screen. First, check if the original streaming video has the same issue. If it doesn’t, try using different software for capturing the video. Sometimes, simply restarting your computer can fix audio sync problems. Make sure your Mac’s software is up to date. Outdated software can cause compatibility issues that affect audio and video sync.Video Quality Issues
Having trouble with poor video quality? It’s common when capturing streaming video. The first step is to check your internet connection. A weak connection can lead to low-resolution captures. Ensure you’re using a reliable screen recording tool. Some tools compress the video too much, leading to quality loss. Adjust the settings in your recording software. For better quality, choose a higher resolution and frame rate. Keep an eye on your storage space as higher quality videos take up more space. Don’t forget to close unnecessary applications. Running multiple programs can slow down your Mac and affect recording quality. Have you tried capturing the video at a different time of day? Sometimes, less internet traffic can improve video quality. By addressing these common issues, you can ensure a smoother experience when copying streaming video on your Mac. What other challenges have you faced? Share your thoughts in the comments!Legal Considerations
Copying streaming videos on a Mac involves legal considerations. Ensure you respect copyright laws to avoid potential issues.
## Legal Considerations Before diving into copying streaming videos on your Mac, you need to understand the legal implications. Not all content is free to copy and share. Ignoring these rules can lead to serious consequences. ###Copyright Laws
Copyright laws protect creators’ rights to their content. You might think streaming videos are free to use, but they are often copyrighted. Copying and distributing this content without permission can get you into trouble. Many platforms have strict rules against copying their content. ###Fair Use Guidelines
Fair use allows you to use copyrighted material without permission in specific cases. These include criticism, commentary, news reporting, teaching, scholarship, or research. The key factors in fair use are the purpose, nature, amount, and effect on the market. For instance, using a short clip for educational purposes might be allowed. However, copying an entire movie and sharing it is not. Ask yourself: “Is my use of this content fair and legal?” If in doubt, it’s better to seek permission.
Credit: democreator.wondershare.com
Frequently Asked Questions
Can You Copy A Streaming Video?
Yes, you can copy a streaming video using screen recording software. Ensure you have the right permissions before doing so.
How Do I Rip Streaming Video On Mac?
Use software like OBS Studio to record streaming video on Mac. Select video source and start recording. Save file locally.
How Do I Copy A Video On My Mac?
Open Finder, locate the video, and right-click. Select “Copy. ” Navigate to the desired location, right-click, and select “Paste. “
How Do I Download A Stream On My Mac?
Download a stream on your Mac by using software like VLC Media Player. Copy the stream URL, then go to “File” > “Open Network”. Paste the URL and click “Open”. Save the stream by selecting “Convert/Stream” under “File”.
Conclusion
Copying streaming video on a Mac is easier than you think. Follow the steps we discussed, and you’ll get the hang of it quickly. Always respect copyright laws while saving your favorite content. Keep your software updated for the best performance.
Practice makes perfect, so give it a try. Soon, you’ll be comfortable with the process. Thanks for reading, and happy streaming!