How to Schedule a Live Stream on YouTube: Step-by-Step Guide
Scheduling a live stream on YouTube is simple. First, you need a YouTube account.
Then, follow these steps to go live at your chosen time. Live streaming on YouTube is a great way to connect with your audience in real-time. Whether you’re hosting a webinar, sharing a tutorial, or just chatting with followers, scheduling your live stream can help you manage your time and promote your event in advance.
By planning ahead, you ensure that your viewers know when to tune in, increasing the chances of a successful broadcast. In this guide, we will walk you through the steps to schedule your live stream on YouTube, making the process easy and stress-free. Get ready to engage with your audience like never before!
Setting Up Your Youtube Channel
Scheduling a live stream on YouTube starts with setting up your YouTube channel properly. You need to have a solid foundation before you can start streaming live. Here’s how to get your channel ready for live streaming.
Creating A Channel
First things first, you need to create a YouTube channel if you don’t already have one. This is your online identity where all your content will be stored.
Go to the YouTube homepage and click on the icon at the top right corner. Select “Create a channel” from the dropdown menu.
Follow the prompts to name your channel. Make it memorable and relevant to your content.
Once your channel is created, personalize it. Add a profile picture and a banner that represents your brand.
Verifying Your Account
Before you can live stream, you need to verify your YouTube account. This helps prevent spam and ensures you’re a real person.
Go to YouTube’s verification page. Enter your phone number to receive a verification code.
Input the code you receive and your account will be verified. This process is quick and straightforward.
Why is verification important? It unlocks features like live streaming and uploading videos longer than 15 minutes.
After verifying your account, take a moment to explore the settings. Customize your channel to fit your style and needs.
Have you ever wondered why some channels look so professional? It’s because they spend time setting up their channel properly.
Now that your channel is set up and verified, you’re one step closer to scheduling your first live stream. What kind of content do you plan to stream live?
Credit: streamyard.com
Accessing Youtube Studio
Accessing YouTube Studio is the first step to schedule a live stream on YouTube. YouTube Studio offers tools to manage and optimize your channel. It helps you monitor performance, engage with your audience, and schedule events. Here’s how to navigate and understand YouTube Studio.
Navigating To Youtube Studio
First, sign in to your YouTube account. Once logged in, click on your profile icon at the top right corner. A dropdown menu will appear. Select “YouTube Studio” from the options. This will direct you to the YouTube Studio dashboard.
Understanding The Dashboard
The dashboard is the control center of your channel. It provides an overview of your channel’s performance. You can see recent videos, analytics, and comments. On the left sidebar, you will find various tools. These include Content, Analytics, Comments, and Settings. Each tool helps you manage different aspects of your channel.
To schedule a live stream, look for the “Create” button. It is usually located at the top right corner. Click on it, and select “Go live”. This will take you to the live control room. Here, you can set up and schedule your live stream.
Creating A New Live Stream
Scheduling a live stream on YouTube is a simple process. First, you need to create a new live stream. This step involves selecting the right options in your YouTube account. Follow these steps to get started.
Selecting ‘create’ Option
Log in to your YouTube account. On the top right corner, you will see a camera icon with a plus sign. Click on it. This is the ‘Create’ option. It allows you to upload videos and go live.
Choosing ‘go Live’
After clicking the ‘Create’ option, a dropdown menu appears. Select ‘Go Live’. This takes you to the live control room. Here, you can set up your live stream details. Fill in your stream title, description, and other settings.
Credit: support.xsplit.com
Configuring Live Stream Settings
Easily schedule a live stream on YouTube by accessing the YouTube Studio. Select ‘Create’, then ‘Go Live’ and set your stream details.
Scheduling a live stream on YouTube is a fantastic way to engage with your audience in real-time. But before you hit that “Go Live” button, you need to configure your live stream settings. This step ensures your live stream reaches the right audience and looks professional. Let’s dive into the crucial aspects of configuring these settings. ###Adding Title And Description
The title and description are the first things your audience will see. Make them count. Choose a title that is catchy and descriptive. It should give viewers a clear idea of what your live stream is about. For example, if you’re hosting a live Q&A session, a title like “Live Q&A: Ask Me Anything About YouTube Marketing” works well. In the description, provide more details about your live stream. Mention what topics you’ll cover and any special guests. This can help attract more viewers and keep them engaged. ###Setting Privacy Options
Privacy settings control who can see your live stream. You have three options: Public, Unlisted, and Private. Public means anyone can see your live stream. This is ideal if you want to reach a broad audience. Unlisted means only people with the link can view it. Use this option for exclusive content for a select group. Private means only you and people you invite can watch. This is useful for test runs or private meetings. Choose the option that best aligns with your goals. If you’re unsure, start with Unlisted to get a feel for how everything works. So, how do you usually decide on your live stream’s title and description? Do you think about the keywords your audience might search for? Configuring these settings properly can make a big difference in your live stream’s success. Aim for clarity, relevance, and engagement to keep your viewers coming back for more.Scheduling The Stream
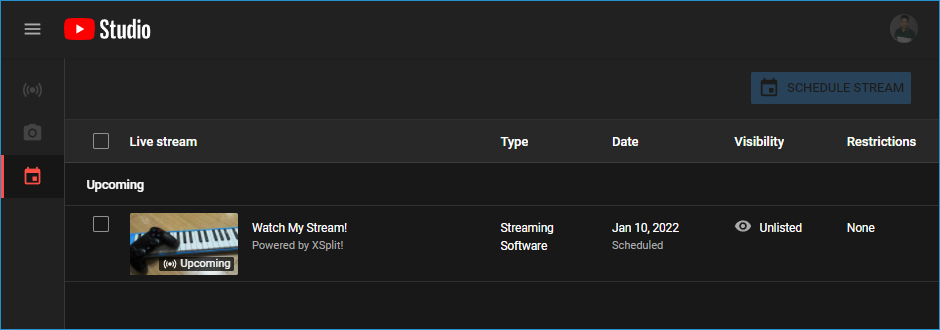
Scheduling a live stream on YouTube can help attract more viewers. It allows your audience to plan and make time for your content. Let’s dive into the steps for scheduling your live stream efficiently.
Choosing Date And Time
Pick a date and time that suits your audience. Check your analytics to find when most of your viewers are online. This ensures more people will join your stream. Avoid scheduling during major events or holidays. This way, you won’t compete for attention. Consistency is key. If you can, stream at the same time weekly.
Setting Up Notifications
Notify your subscribers about the upcoming stream. YouTube offers a built-in feature to notify your audience. Enable notifications when you schedule the stream. This sends alerts to your subscribers. Promote your stream on your social media channels. Remind your audience with posts and stories. Reaching out multiple times can help increase turnout.

Credit: www.youtube.com
Customizing Stream Appearance
When scheduling a live stream on YouTube, customizing its appearance is crucial to grab viewers’ attention and ensure they stick around. A well-designed stream can make a significant difference in viewership and engagement. Let’s dive into how to effectively customize your stream’s appearance.
Adding Thumbnail
The thumbnail is the first thing your audience sees, so make it count. Choose an image that’s clear, relevant, and visually appealing. A high-quality thumbnail can entice viewers to click on your stream.
Use bright colors and bold text to stand out. Include your face if possible, as people connect with human expressions. Remember, the thumbnail should accurately represent your stream content to set the right expectations.
I once used a generic thumbnail for a live stream about tech gadgets, and it didn’t do well. The next time, I created a custom thumbnail featuring a popular gadget and saw a significant increase in viewers. This small change made a big impact.
Selecting Category
Choosing the right category for your live stream helps YouTube recommend it to the right audience. Select a category that best fits your content, whether it’s gaming, education, or entertainment.
This helps in reaching viewers who are already interested in your topic. If your content spans multiple categories, think about what your primary audience would search for.
For example, if your stream is about cooking tutorials, select the “How-to & Style” category. This ensures that users looking for cooking tips and recipes are more likely to find your stream.
Have you ever noticed how some streams seem to pop up more frequently in your recommendations? It’s likely because they were categorized correctly. This simple step can make your stream more discoverable.
Take a moment to think about how you can improve your stream’s appearance. What changes will you make to attract more viewers? Customizing your stream appearance effectively can set you apart and drive more engagement.
Testing Your Stream
Testing your stream before going live is crucial. It ensures a smooth and professional broadcast. By checking audio and video and running a private test, you can avoid potential issues. Let’s dive into the details of each step.
Checking Audio And Video
First, verify your audio. Clear sound is essential for engagement. Use a good microphone. Speak at a normal volume. Listen for background noise. Adjust your settings if needed.
Next, check your video. Ensure good lighting. Position the camera at eye level. Make sure the background is tidy. Test your video resolution. It should be at least 720p. Higher quality provides a better viewer experience.
Running A Private Test
Before broadcasting publicly, run a private test. This helps identify any issues. Set the stream to “Private” in YouTube Studio. Start your stream as if it is live.
Observe everything closely. Check the audio and video again. Note any problems. Make adjustments as needed. Repeat the test until satisfied. This step ensures your live stream runs smoothly.
Promoting Your Live Stream
Learn to schedule a live stream on YouTube effortlessly. Select “Create” and then “Go Live” from your dashboard. Choose your stream’s date and time, and you’re set!
Promoting Your Live Stream Once you’ve scheduled your live stream on YouTube, promoting it effectively is crucial. Without promotion, your audience may not know when and where to tune in. Let’s dive into some actionable strategies to get the word out.Sharing On Social Media
Social media is your best friend when it comes to promotion. Share your live stream details on platforms like Facebook, Twitter, and Instagram. Use eye-catching images and engaging captions to grab attention. Create a countdown to build excitement. Post reminders leading up to the stream. Engage your followers by asking them to share your posts. Don’t forget to use relevant hashtags. They help increase visibility and reach a broader audience. For instance, if your stream is about gaming, use hashtags like #GamingLiveStream or #YouTubeGaming.Engaging With Your Audience
Start engaging with your audience even before the live stream. Create a teaser video or a behind-the-scenes look to pique their interest. This builds anticipation and makes your audience feel involved. Use community posts on YouTube to interact with your subscribers. Ask them questions, run polls, or share sneak peeks. This keeps the conversation going and makes your audience feel valued. During the live stream, acknowledge your viewers by name. Answer their questions and respond to their comments. This real-time interaction makes your audience feel special and more likely to join future streams. What strategies have you found effective in promoting your live streams? Share your thoughts and let’s learn from each other.Frequently Asked Questions
How To Schedule Livestreams On Youtube?
To schedule a livestream on YouTube, go to YouTube Studio. Click “Create,” then “Go live. ” Select “Schedule Stream,” set your date, time, and details.
How To Set Up A Youtube Live Event?
Go to YouTube Studio. Click “Create” and select “Go live. ” Set up your live stream details. Click “Save. “
Does Scheduled Youtube Live Stream Start Automatically?
No, scheduled YouTube live streams do not start automatically. You must manually start the live stream.
Can You Watch A Youtube Live Stream Later?
Yes, you can watch a YouTube live stream later. Creators often save and upload the stream as a video.
Conclusion
Scheduling a live stream on YouTube is simple and rewarding. Follow the steps carefully. Ensure your settings match your needs. Engage with your audience during the stream. Consistency will help build your viewership. Test everything ahead of time. This avoids technical issues.
Keep improving with each stream. Practice makes perfect. Happy streaming!