How to Stream on Twitch With OBS: Master Your Live Broadcast
Streaming on Twitch with OBS is easier than you think. Let’s dive right in.
Twitch is the go-to platform for live streaming. OBS, or Open Broadcaster Software, is a powerful tool for streamers. Together, they make a perfect pair for broadcasting. Whether you’re a gamer, artist, or talk show host, knowing how to set up OBS for Twitch can boost your online presence.
You don’t need to be tech-savvy to get started. This guide will show you how to stream on Twitch with OBS in simple steps. We’ll cover everything from downloading OBS to setting up your stream. By the end, you’ll be ready to share your content with the world. Let’s get started!
Introduction To Streaming On Twitch
Streaming on Twitch has become a popular way for gamers and content creators to connect with audiences around the world. If you’re looking to share your gameplay, creative projects, or even just chat with viewers, Twitch offers a platform that can help you build a community. Whether you’re a seasoned streamer or new to the scene, understanding the basics of streaming on Twitch can set you on the path to success.
Why Stream On Twitch?
Twitch is a leading platform for live streaming content. It offers a wide range of categories, from gaming to music and art, making it a versatile choice for many creators. By streaming on Twitch, you can reach a global audience, interact with viewers in real-time, and potentially monetize your content.
Moreover, Twitch provides tools to help you grow your channel, such as analytics and customization options. You can build a loyal following and create a space where people come back to watch your streams regularly. This engagement can lead to partnerships and sponsorships, providing financial benefits.
Benefits Of Using Obs
Open Broadcaster Software (OBS) is a free and open-source tool that many streamers use to broadcast their content on Twitch. OBS is highly customizable, allowing you to tailor your streams to your specific needs. Whether you want to add overlays, alerts, or different scenes, OBS makes it possible.
One of the main advantages of OBS is its ease of use. You don’t need advanced technical skills to get started. The software is intuitive, and there are plenty of tutorials available online to guide you through the setup process. Additionally, OBS is lightweight, so it won’t consume too many system resources, ensuring smooth and high-quality streams.
Another significant benefit is the community support. Many streamers use OBS, so you’ll find a wealth of knowledge and advice from fellow creators. This can be invaluable when troubleshooting issues or learning new features. Plus, regular updates keep OBS fresh and capable of meeting the evolving needs of streamers.
Are you ready to start your streaming journey? Dive into Twitch with OBS and watch your community grow!
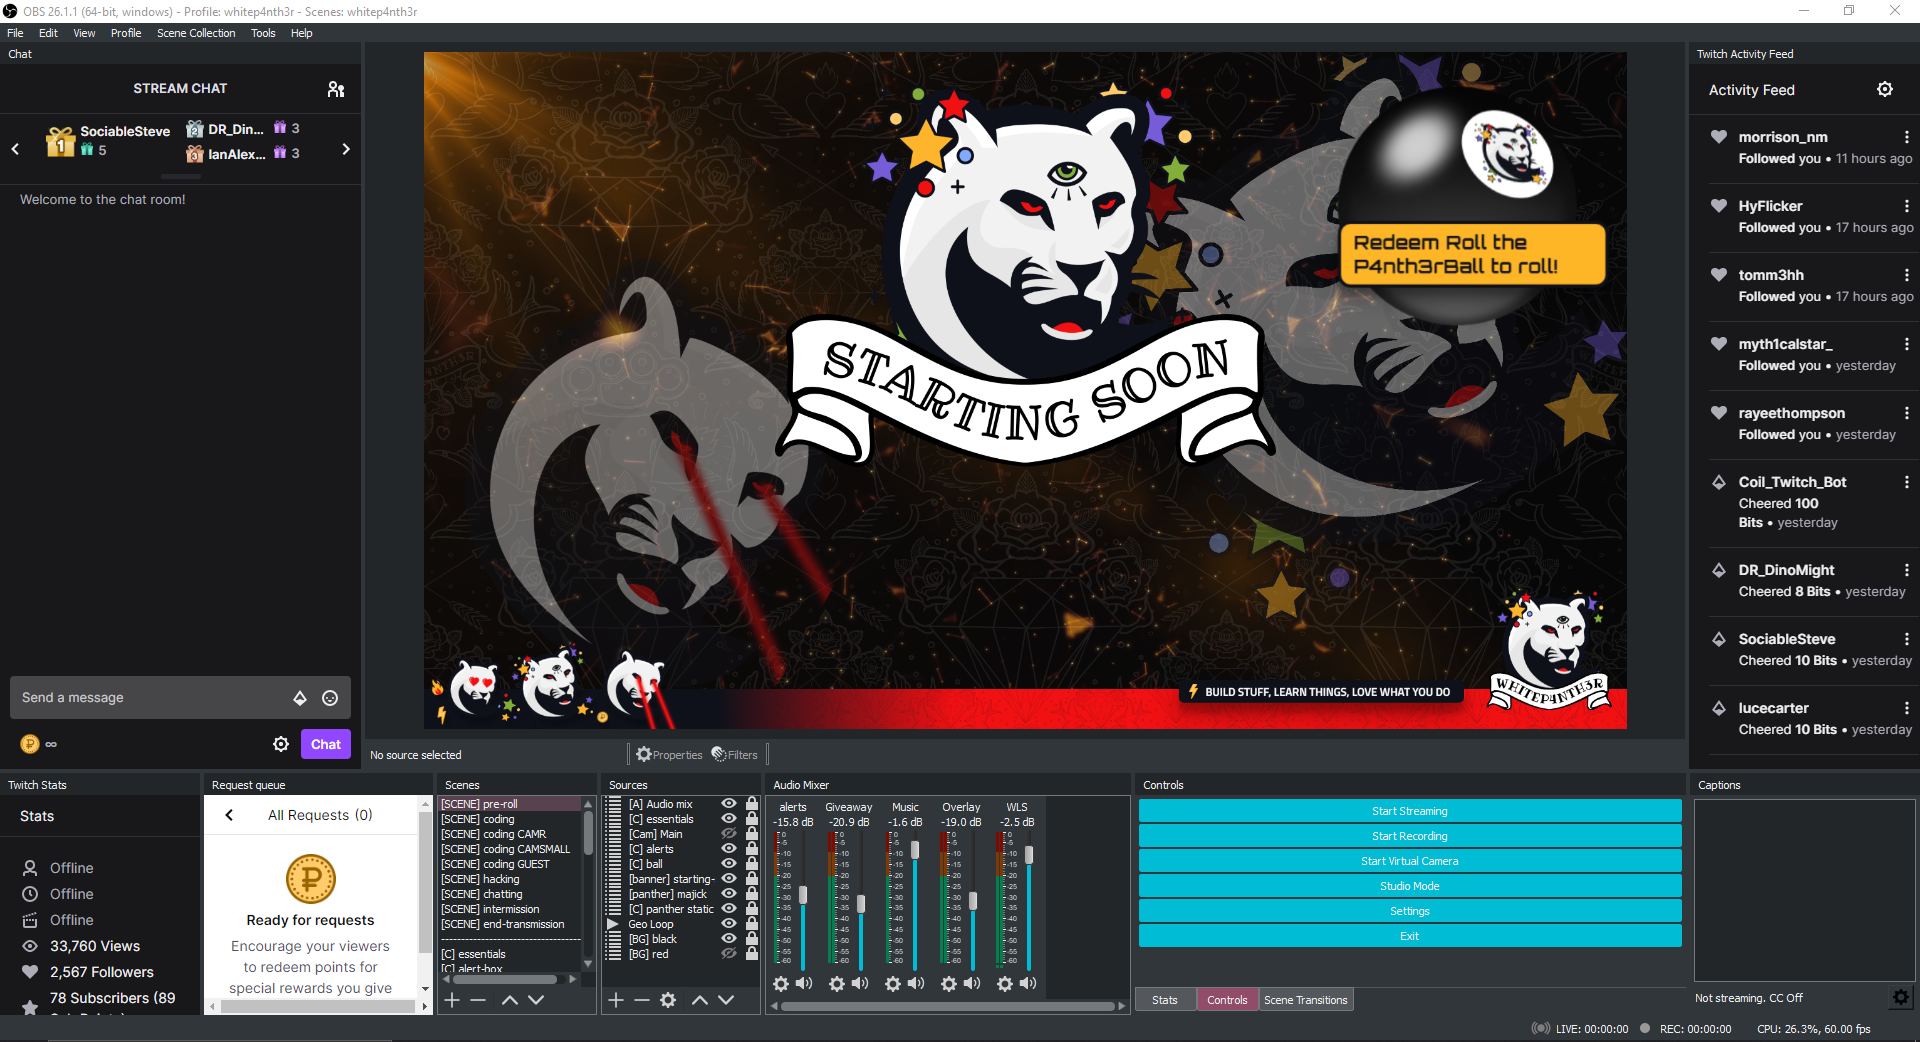
Credit: whitep4nth3r.com
Setting Up Your Twitch Account
Setting up your Twitch account is the first step to start streaming with OBS. A well-prepared account ensures a smooth streaming experience. Let’s dive into the details of creating and customizing your Twitch account.
Creating A Twitch Account
To begin, visit the Twitch website. Click on the “Sign Up” button. Fill out the required fields like username, password, and email. Choose a strong password to keep your account secure. Verify your email address to complete the registration. Now you have your Twitch account.
Customizing Your Channel
Once your account is ready, it’s time to customize your channel. Go to your profile settings. Add a profile picture that represents you. Write a bio to introduce yourself to viewers. Choose a banner image to make your channel look professional.
Next, set up your channel panels. Panels help viewers learn more about you. You can add links to your social media and donation pages. Organize your panels to make your channel look neat. Customization makes your channel unique and inviting.
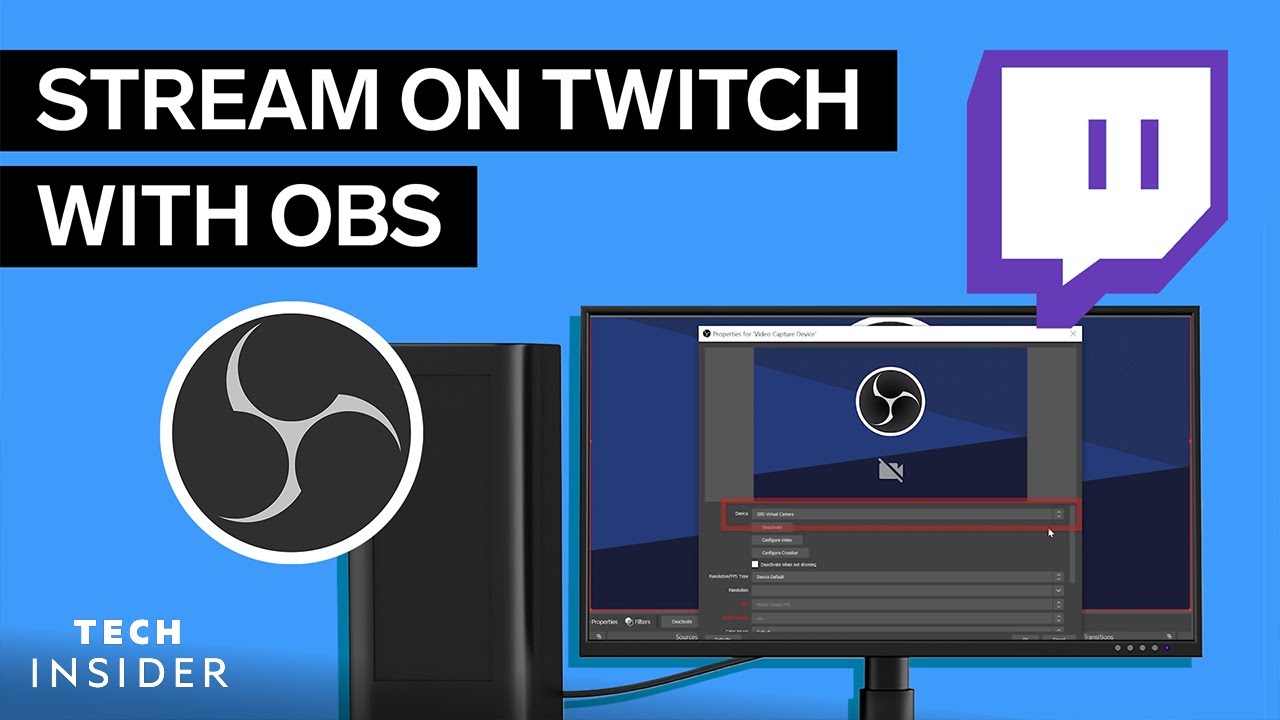
Installing And Configuring Obs
Getting started with streaming on Twitch using OBS can seem a bit overwhelming at first, but with the right guidance, it’s a breeze. OBS, which stands for Open Broadcaster Software, is a powerful, open-source tool that allows you to stream your gameplay, art, or just about anything else. Let’s break down the steps to install and configure OBS so that you can start streaming in no time.
Downloading Obs
First things first, you need to download OBS from the official website. Go to obsproject.com and choose the version that matches your operating system. OBS supports Windows, macOS, and Linux.
Once the download is complete, open the installer. Follow the prompts to install OBS on your computer. It’s straightforward—just click “Next” a few times. Feel free to customize the installation directory if you like, but the default options work just fine.
After installation, launch OBS. You’re now ready to dive into the initial setup process.
Initial Obs Setup
When you first open OBS, you’ll be greeted by the Auto-Configuration Wizard. This is a handy tool for beginners. It helps you set up the basic settings tailored to your hardware and internet connection.
Click “Yes” to start the wizard. You’ll be asked whether you want to optimize for streaming, recording, or both. Choose the option that fits your needs. For Twitch streaming, select “Optimize for streaming.”
Next, OBS will perform a series of tests to determine the best settings for your system. This includes testing your network bandwidth and hardware capabilities. It might take a few minutes, so be patient.
Once the tests are complete, OBS will present you with the recommended settings. Click “Apply Settings” to finalize the initial setup. You can always tweak these settings later if needed.
Now that OBS is installed and configured, you’re one step closer to going live on Twitch. Have you ever wondered how the pros set up their streams? What small tweaks could make your stream stand out? Stay tuned as we delve deeper into customizing your OBS setup to create a unique and engaging stream!
Optimizing Obs Settings
Optimizing OBS settings is crucial for a smooth streaming experience on Twitch. Proper settings ensure your stream runs well and looks good to viewers. In this section, we’ll cover key areas to fine-tune in OBS.
Video And Audio Settings
Start with the video settings. Set the base resolution to match your monitor. For most, this is 1920×1080. Next, choose an output resolution. A common choice is 1280×720. This resolution works well for most viewers and reduces the load on your system.
Adjust the FPS (frames per second). 30 FPS is a good starting point. If your system can handle it, 60 FPS offers smoother motion. Test both to see what works best for you.
Audio settings are just as important. Use a high-quality microphone for clear sound. In the audio settings, set the sample rate to 48 kHz. This provides good audio quality for your stream. Ensure your desktop and mic levels are balanced. You want your voice to be clear over any game or background sounds.
Stream Quality Adjustments
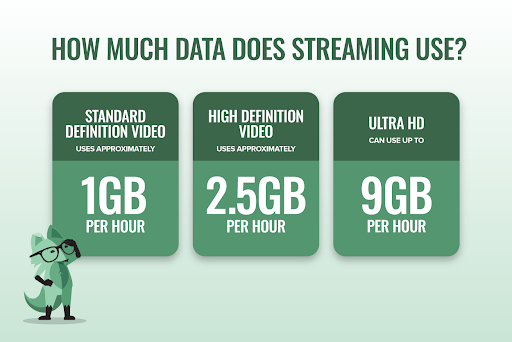
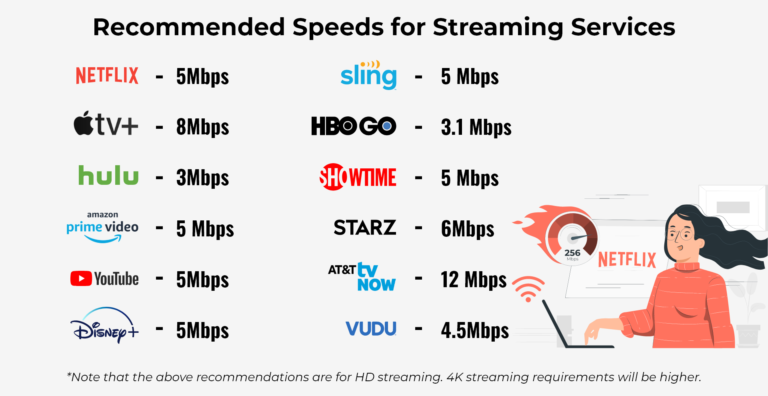
Stream quality depends on your internet speed and computer specs. Start with the bitrate. For 720p at 30 FPS, a bitrate of 2500 kbps is a good starting point. Increase it if your internet can handle more. For 1080p at 60 FPS, aim for 6000 kbps.
Next, choose the encoder. OBS offers software (x264) and hardware (NVENC) options. NVENC is recommended if you have an NVIDIA GPU. It offloads the encoding to your GPU, freeing up your CPU for other tasks.
Finally, test your stream. Run a private stream to check the quality. Make adjustments as needed. You want a balance between good quality and smooth performance.
Adding Sources To Your Stream
When you’re ready to stream on Twitch with OBS, adding sources to your stream is a crucial step. Sources are the elements that make up your stream, such as your game, webcam, and microphone. Understanding how to add and manage these sources will help you create a professional and engaging stream.
Game Capture
First, let’s talk about adding your game to the stream. In OBS, click on the “+” button in the “Sources” box and select “Game Capture.” This will open a new window where you can choose the specific game you want to capture. Make sure the game is running before you try to add it.
Choose “Capture specific window” from the Mode dropdown menu. Then select the game from the Window dropdown. This ensures OBS captures only your game, not other applications. Adjust the settings as needed and click “OK.”
If your game isn’t showing up, try running OBS as an administrator. This often resolves capture issues. Check the game and OBS settings to ensure compatibility. Have you ever faced game capture problems? Share your experience and solutions in the comments!
Webcam And Microphone
Next, you’ll want to add your webcam and microphone. These elements make your stream more personal and engaging. To add a webcam, click the “+” button in the “Sources” box and select “Video Capture Device.” Choose your webcam from the Device dropdown and adjust the settings.
Position and resize your webcam feed within the main window. You can move it to any corner or even overlay it on your game. Experiment with the placement to see what looks best. Remember, a well-placed webcam can enhance viewer experience.
For audio, click the “+” button again and select “Audio Input Capture.” Choose your microphone from the Device dropdown. Adjust the volume levels in the Audio Mixer to ensure clear sound. Proper audio balance is crucial for keeping your audience engaged. Have you ever struggled with audio issues? How did you fix them?
Adding sources to your stream is a vital step in creating a polished and engaging broadcast. Take the time to set them up correctly, and you’ll be well on your way to streaming success!
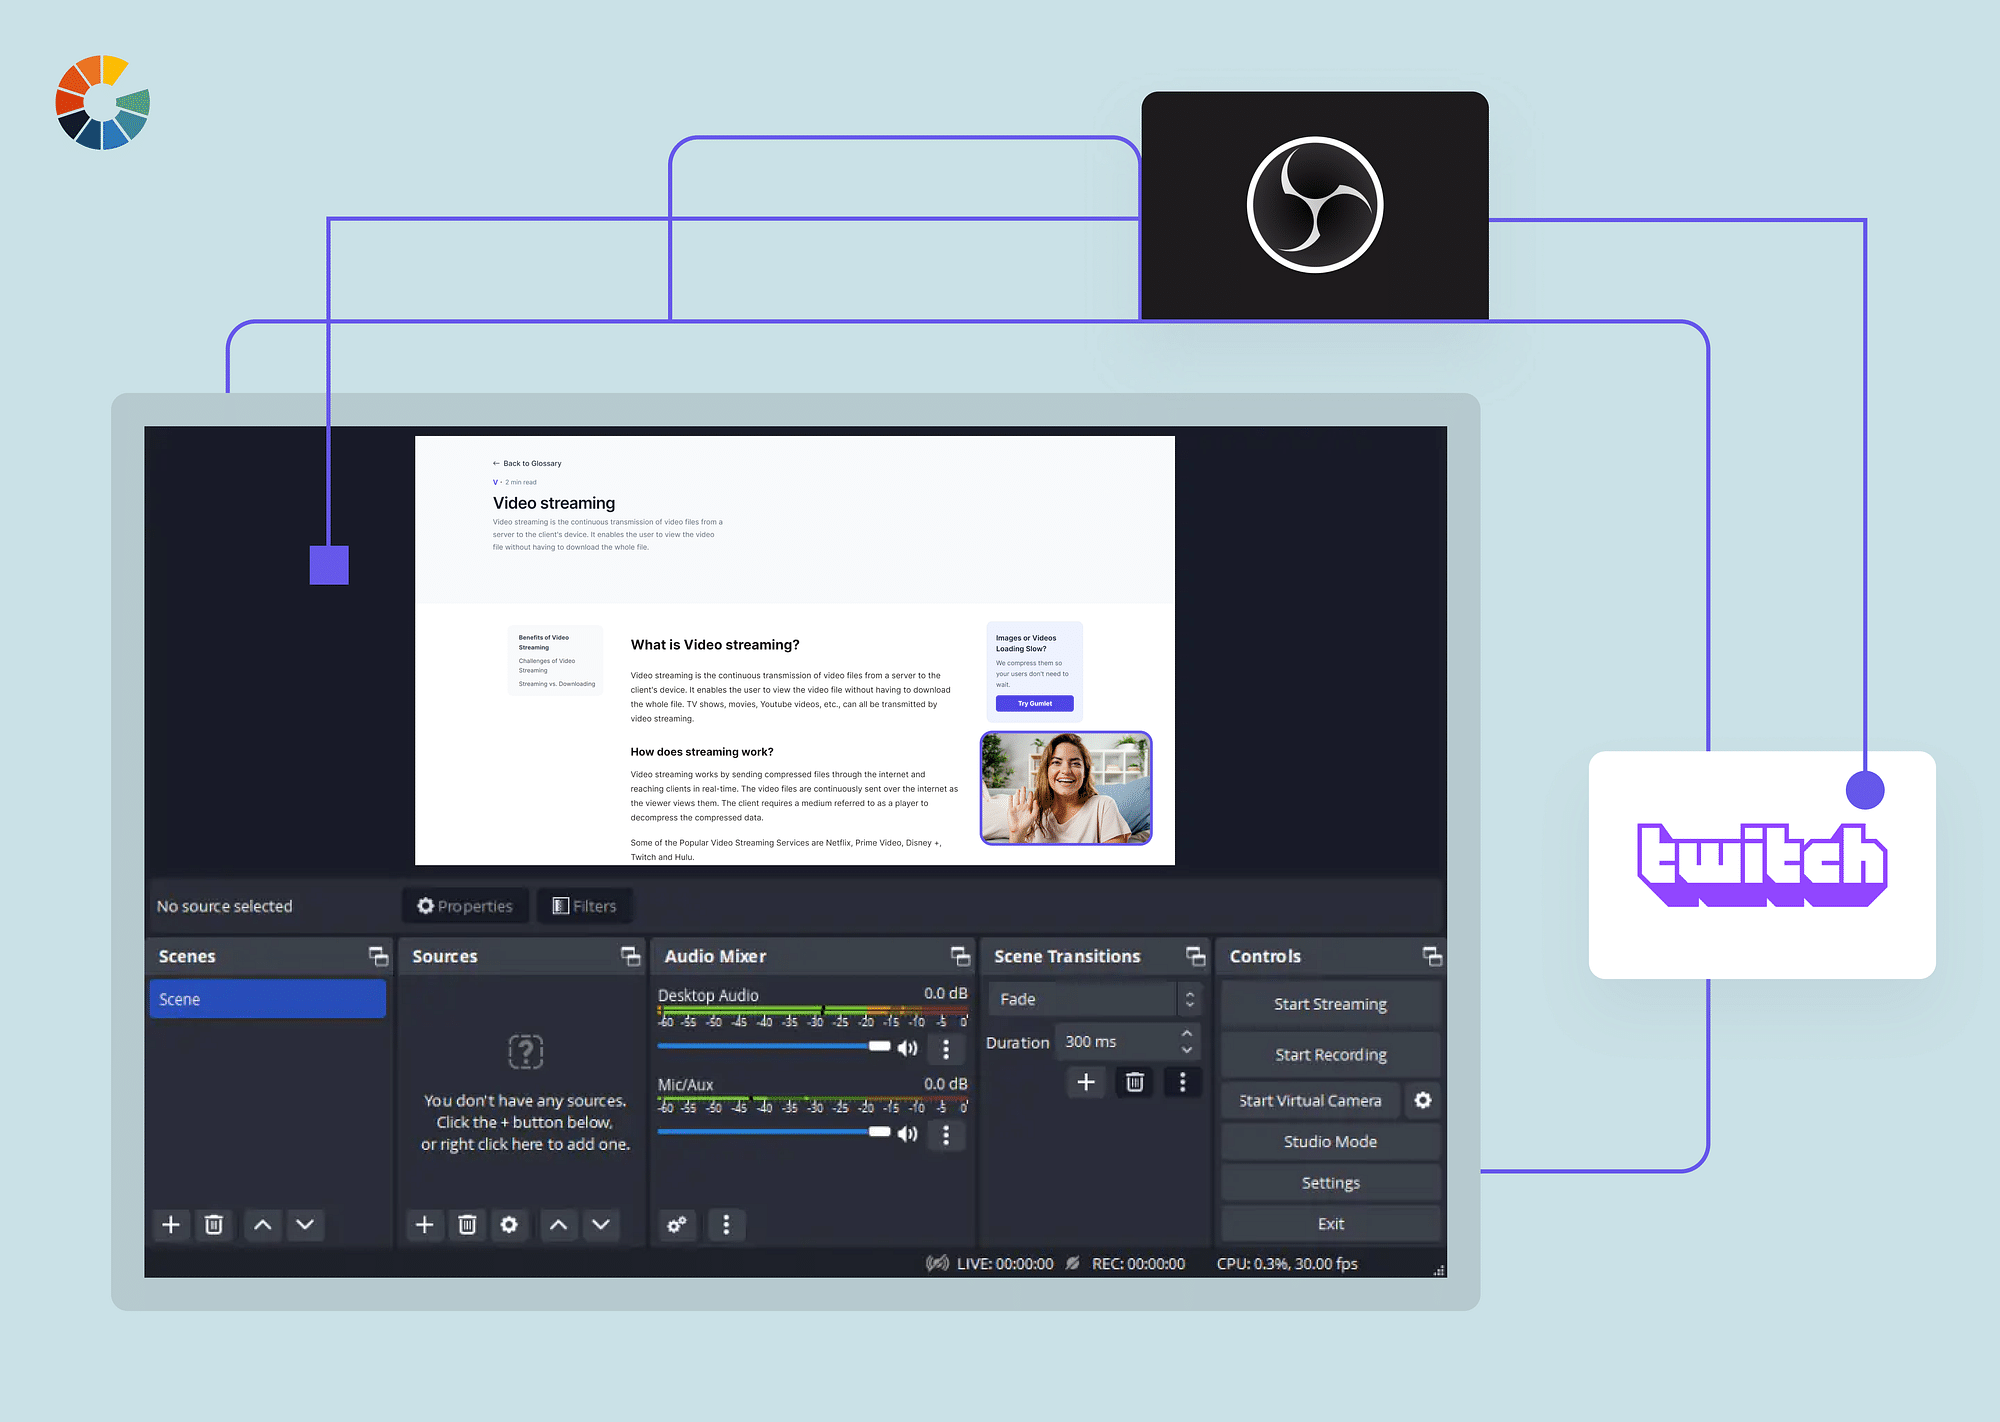
Credit: www.gumlet.com
Creating An Engaging Overlay
Creating an engaging overlay is crucial for a successful Twitch stream. Overlays add personality and enhance viewer experience. They can display useful information and make your stream more interactive. Here’s how to design and use overlays effectively.
Designing Your Overlay
Start by thinking about your stream’s theme. Choose colors and fonts that reflect your personality. Use a consistent style throughout your overlay. Include elements like webcam frames, alerts, and chat boxes. Make sure they don’t cover important parts of the screen. Simplicity is key.
Ensure that your overlay complements your gameplay. Avoid cluttering the screen with too many elements. Keep it clean and professional. You can use graphic design tools like Photoshop or Canva. These tools help create custom graphics. There are also many free templates available online.
Using Streamlabs For Overlays
Streamlabs offers an easy way to add overlays to your stream. It has a variety of pre-made themes and templates. These are customizable to fit your style. First, download and install Streamlabs OBS. It integrates with Twitch seamlessly.
After installation, open Streamlabs OBS and log in with your Twitch account. Go to the “Themes” tab in the dashboard. Browse through the available options. Select a theme that matches your branding. Click “Install” to add it to your stream layout.
You can customize these overlays further. Add or remove elements as needed. Adjust their position and size on the screen. Streamlabs also allows you to create your own overlays from scratch. Use the “Editor” tab to design unique overlays. Save your changes and start streaming with a fresh new look.
Interacting With Your Audience
Engage viewers by responding to chat messages during your Twitch stream with OBS. Use alerts to acknowledge new followers.
Interacting with your audience is crucial for a successful Twitch stream. It makes your viewers feel valued and helps build a loyal community. Engaging with your audience can turn a casual viewer into a dedicated fan. OBS (Open Broadcaster Software) offers many tools to help you interact with your viewers effectively. Let’s explore how you can manage chat and use alerts and notifications to keep your audience engaged.Managing Chat
Managing chat is one of the most important parts of streaming. Keep an eye on your chat box to see what your viewers are saying. Respond to their comments and questions. This makes them feel involved in your stream. You can use OBS’s built-in tools or third-party chatbots to help manage chat. These tools can filter out spam and inappropriate messages. They can also highlight important messages for you. Set clear rules for your chat. This helps maintain a positive environment. Make sure to enforce these rules consistently.Using Alerts And Notifications
Using alerts and notifications can enhance your stream. Alerts can notify you when someone follows, subscribes, or donates. This gives you a chance to thank them in real-time. OBS allows you to customize alerts to match your stream’s theme. You can also set up notifications for other events. For example, you can get notified when a viewer mentions you in the chat. This helps you stay responsive and engaged. Use these tools to acknowledge and appreciate your audience. This makes them feel special and encourages them to interact more.Going Live On Twitch
Stream effortlessly on Twitch using OBS. Set up your account, configure OBS settings, and start sharing your gameplay. Connect with your audience in real-time.
Going live on Twitch can be a thrilling experience. It’s your chance to share your gaming, art, or any other passion with a global audience. Using OBS (Open Broadcaster Software) makes this process smooth and professional. Let’s dive into the key steps to ensure your stream is a hit. ###Starting Your Stream
First, make sure your OBS is set up correctly. Double-check your scenes and sources. Ensure your webcam and microphone are working. Before you hit the “Start Streaming” button, preview your stream. This helps you catch any issues early. Check your audio levels, video quality, and overlays. When you’re ready, go ahead and click “Start Streaming.” OBS will connect to Twitch, and you’ll be live within seconds. It’s that simple! ###Monitoring Stream Health
Once you’re live, it’s crucial to keep an eye on your stream’s performance. OBS provides a handy stats window. This shows you the CPU usage, dropped frames, and bitrate. Pay attention to viewer feedback. If people mention lag or audio issues, address them promptly. This keeps your audience engaged and happy. Use Twitch’s dashboard to monitor your stream in real-time. It offers insights into viewer counts, chat activity, and stream quality. Keeping an eye on these metrics ensures a smooth streaming experience. Streaming on Twitch is about more than just playing games or sharing your skills. It’s about engaging with your audience and creating a community. Are you ready to go live?Post-stream Best Practices
After you finish your stream on Twitch, it’s important to follow some best practices. These practices help you grow and maintain your channel. They involve analyzing your stream and engaging with your community.
Analyzing Stream Performance
Review your stream data on Twitch. Look at viewer numbers and chat activity. This helps you understand what worked well. Identify peak times when viewers were most active. This can guide you on the best times to stream.
Check which parts of your stream had the most engagement. Was it your gameplay, your commentary, or something else? Use this information to improve future streams. Make note of any technical issues. Work on fixing them for next time.
Engaging With Your Community
After your stream, thank your viewers. Showing gratitude builds loyalty. Reply to comments and questions in your chat. This makes your viewers feel valued. Share highlights or clips from your stream on social media. This keeps your community engaged even after the stream ends.
Ask for feedback from your audience. They can offer valuable insights. Use their suggestions to improve. Plan your next stream based on their interests. Stay active on your Twitch channel, even when you are not streaming. Your presence matters.
Credit: restream.io
Frequently Asked Questions
How To Start Streaming With Obs?
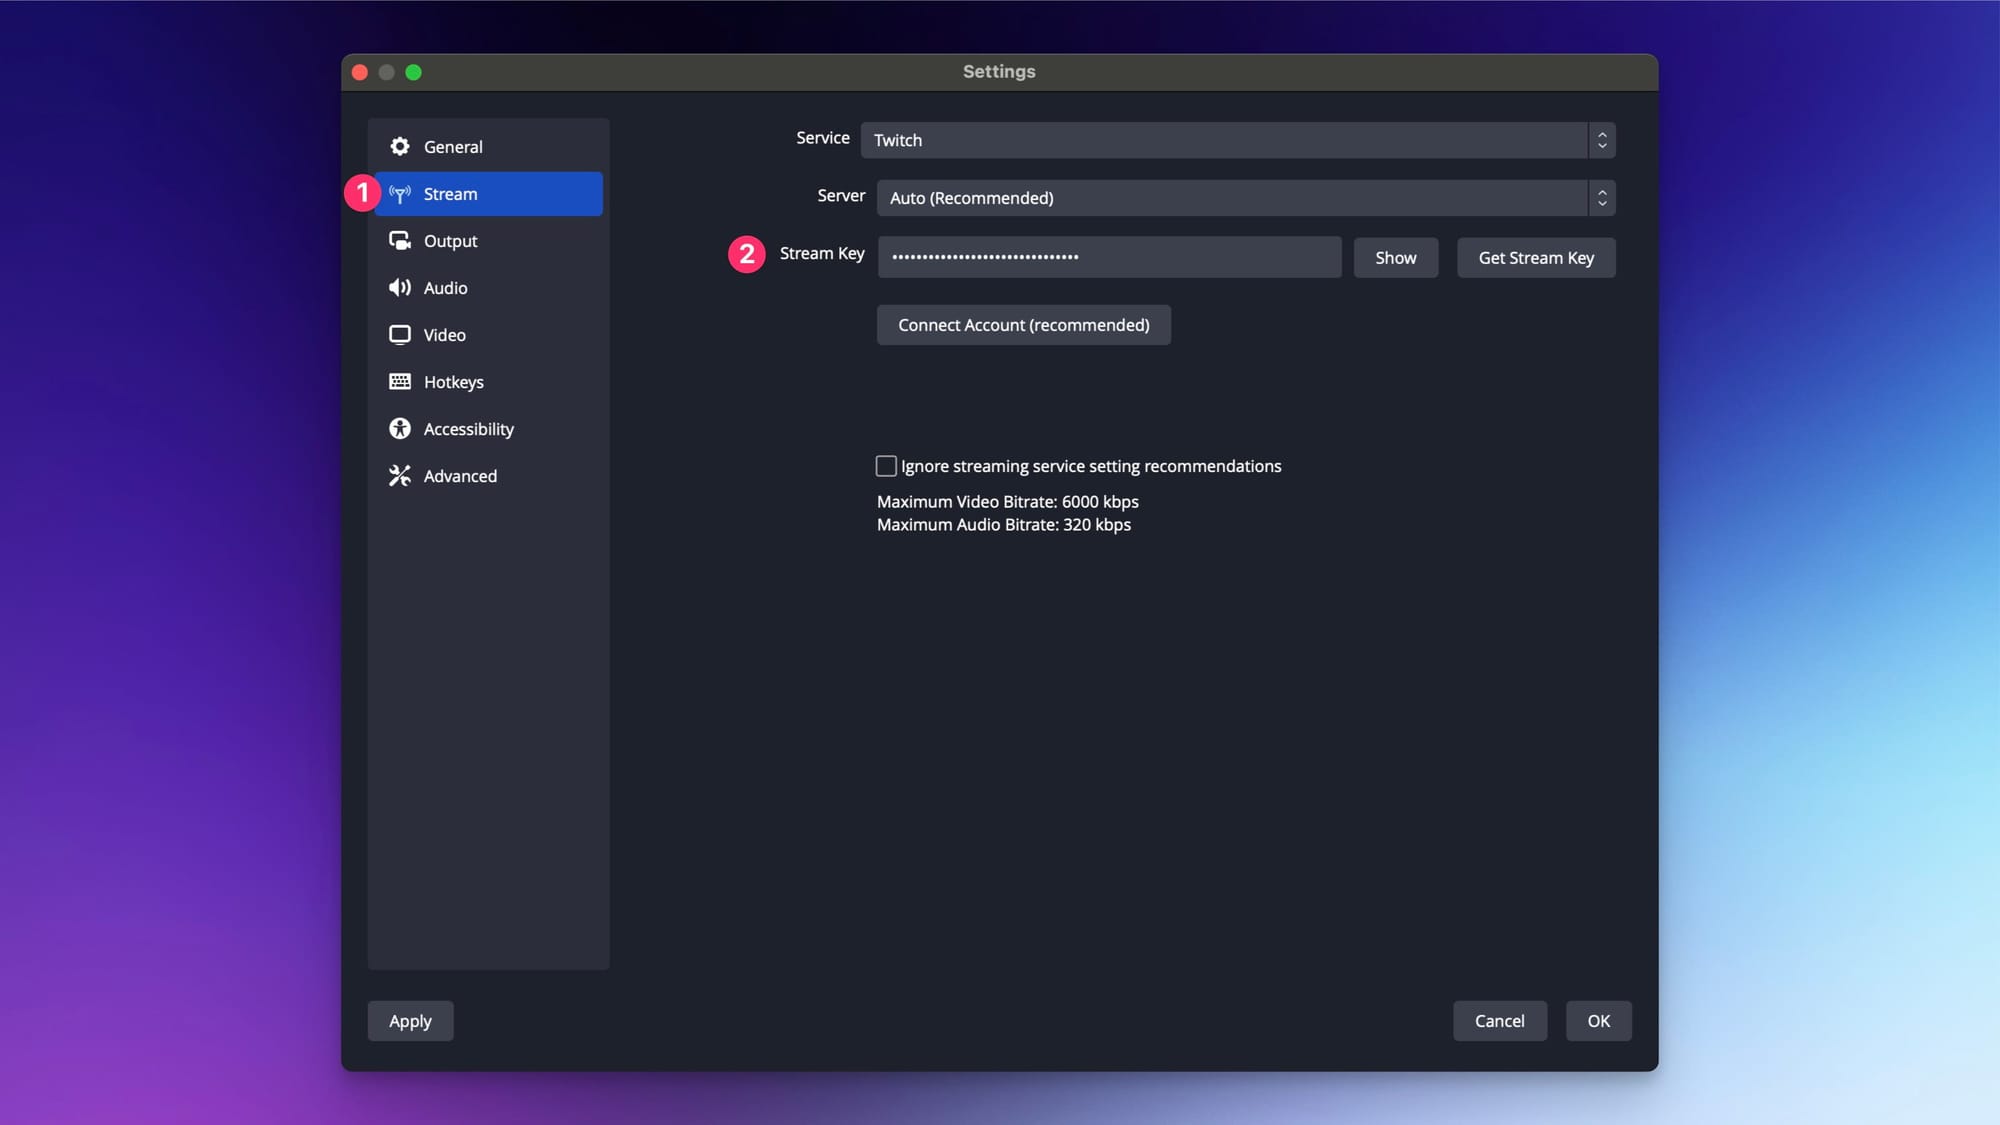
Download and install OBS Studio. Configure settings like resolution and bitrate. Add sources such as webcam or screen capture. Connect streaming platform via Stream Key. Click “Start Streaming. “
How Do I Stream My Screen With Obs?
To stream your screen with OBS, launch OBS, add a “Display Capture” source, adjust settings, and start streaming.
What Obs Settings Are Needed For Twitch Streaming?
For Twitch streaming with OBS, set video bitrate to 2500-4000 kbps, audio bitrate to 160 kbps, and resolution to 1920×1080. Choose 30 or 60 FPS and use hardware encoding for better performance.
Why Isn’t Obs Letting Me Stream On Twitch?
OBS may not be streaming on Twitch due to incorrect stream key, outdated software, or internet issues. Check settings.
Conclusion
Streaming on Twitch with OBS is simple with the right steps. Set up your account and connect OBS. Customize your settings for the best quality. Engage with your viewers. Be consistent with your streaming schedule. Practice makes perfect. Enjoy your time streaming and building your community.
Happy streaming!